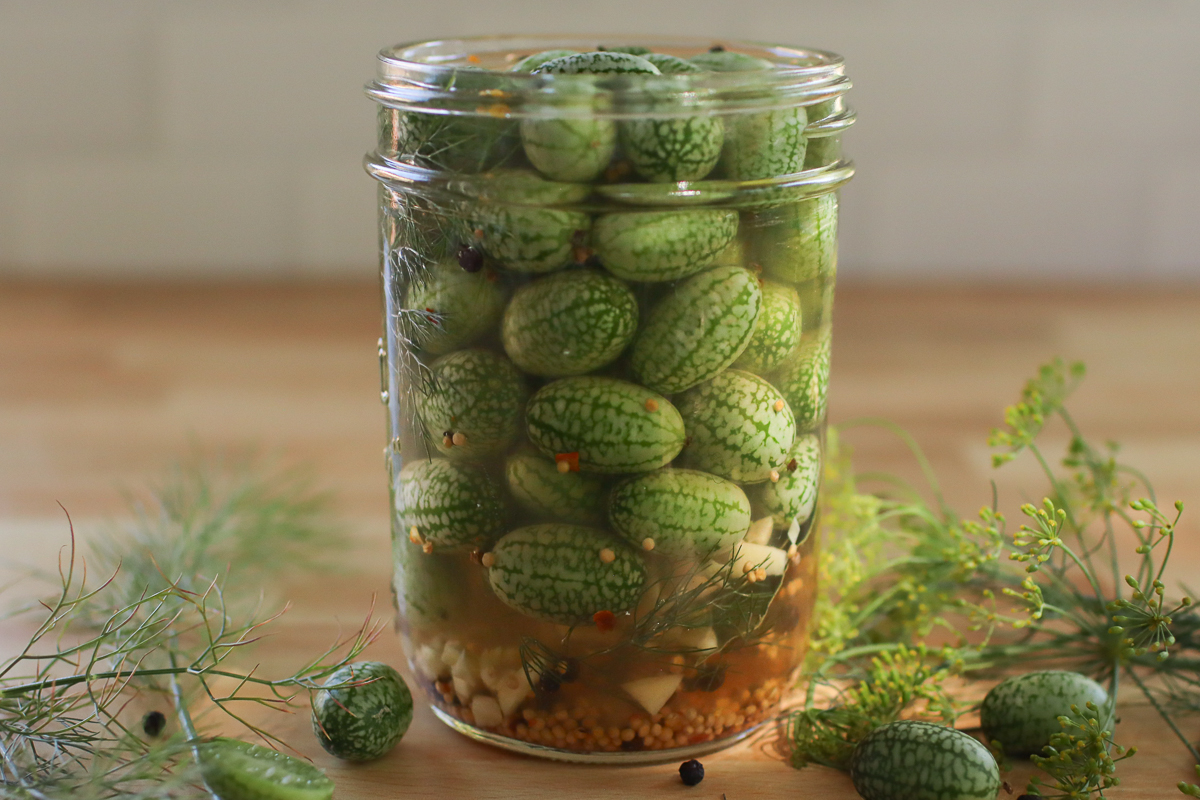
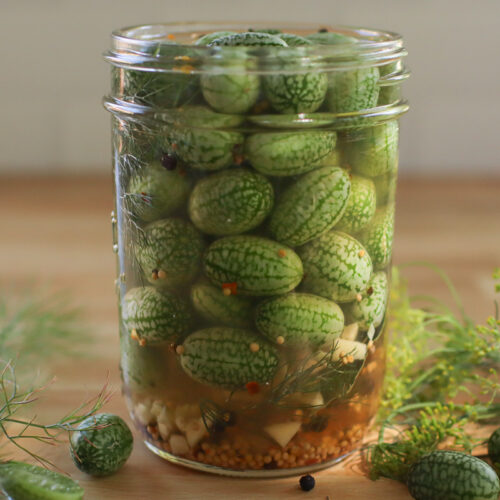
Cucamelon Pickles

Cucamelons are such a fun and unique garden crop – why not make them into pickles?! These cucamelon pickles are tangy, salty, and delicious. They last for months in the fridge and make a great addition to snack plates, charcuterie boards, sandwiches, and more.
When I first saw cucamelons at the farmer’s market, I knew I wanted to grow them myself. They are the cutest, most snackable garden veggie, and I love any crops that I can eat straight off the plant while working in my garden!
It took 3 years of failure before I finally got healthy cucamelon plants, but once I did, they seriously took off! I was giving them away by the quart, so none went to waste.
Besides giving them away, I knew I needed to preserve some, and with their relation to cucumbers, cucamelon pickles were the obvious answer.
These little bite-sized pickles are so good, I’ll be growing cucamelons every year with them in mind.
If you have more cucamelons than you know what to do with, or you simply want a delicious garden-fresh snack, you need to try this recipe!
What are Cucamelons?
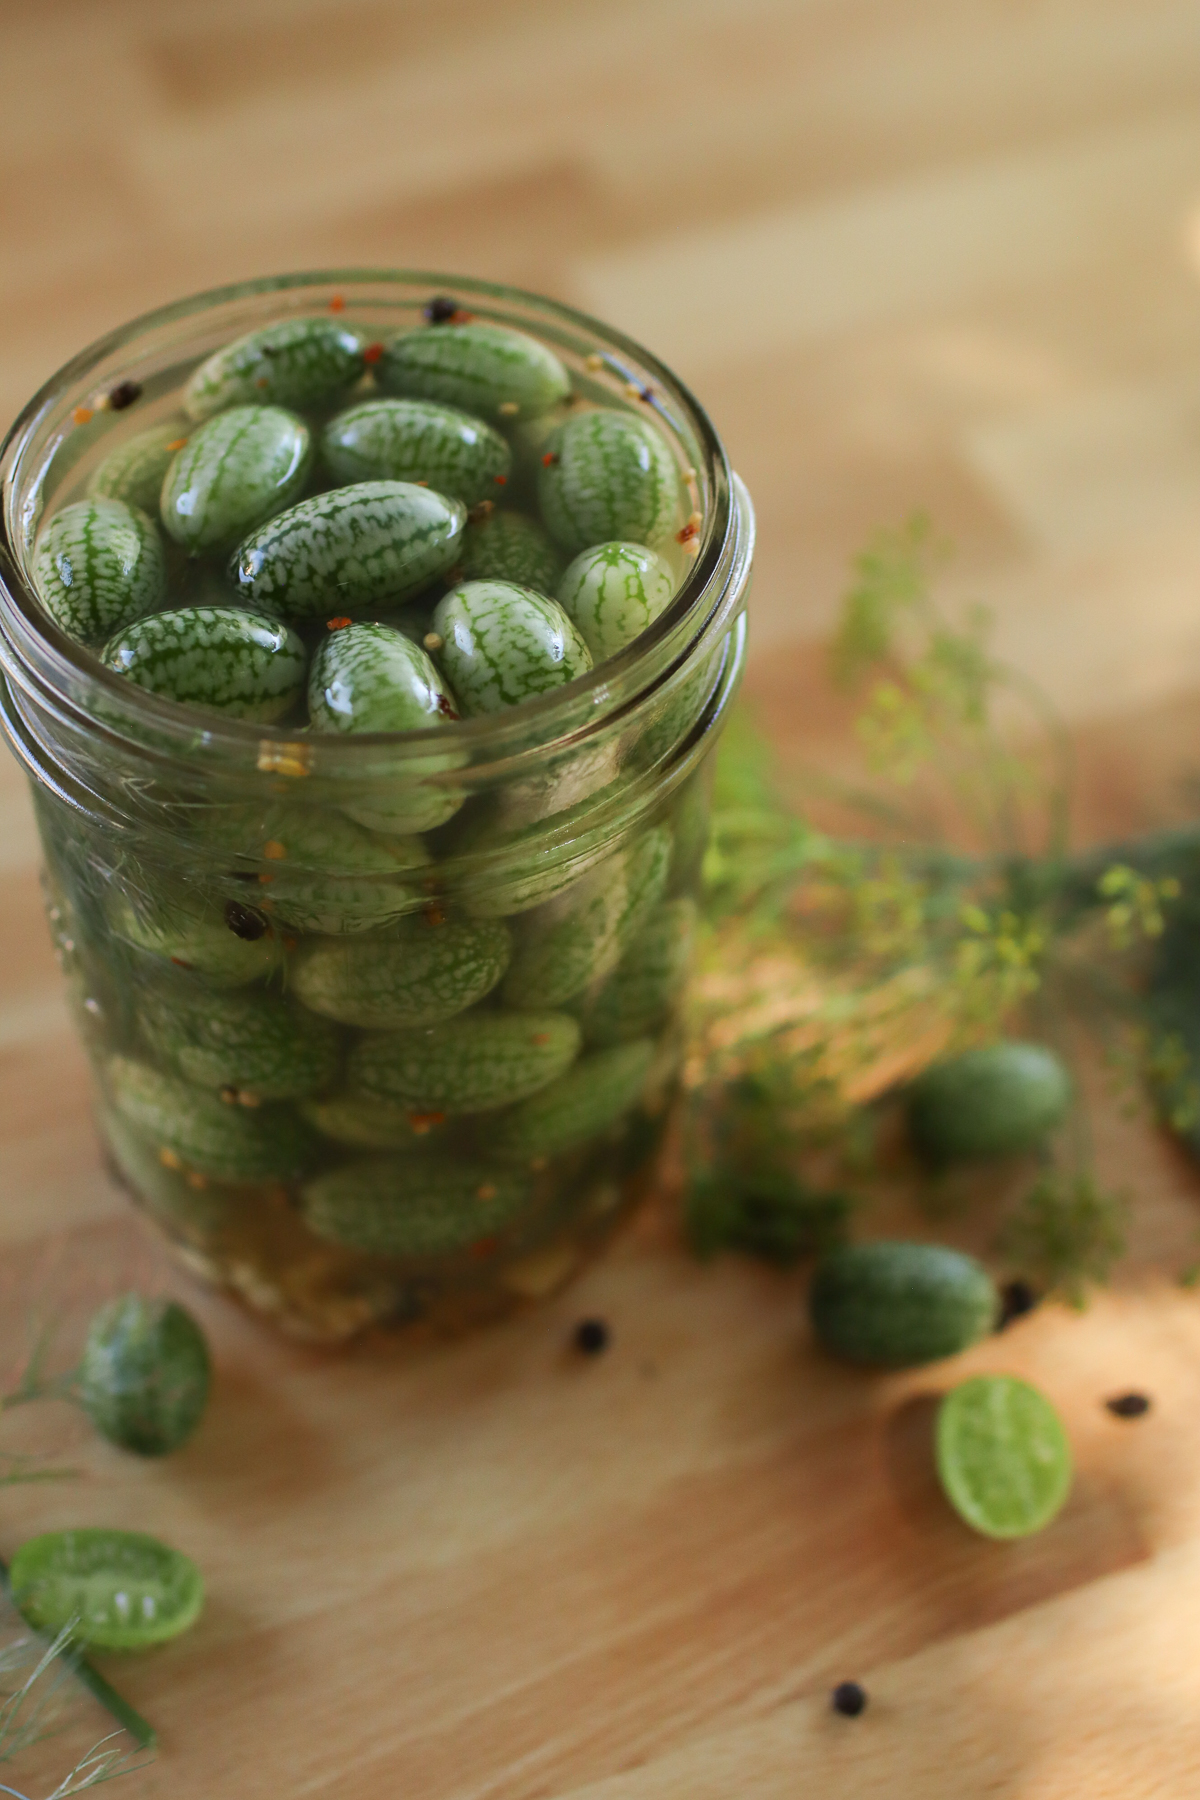
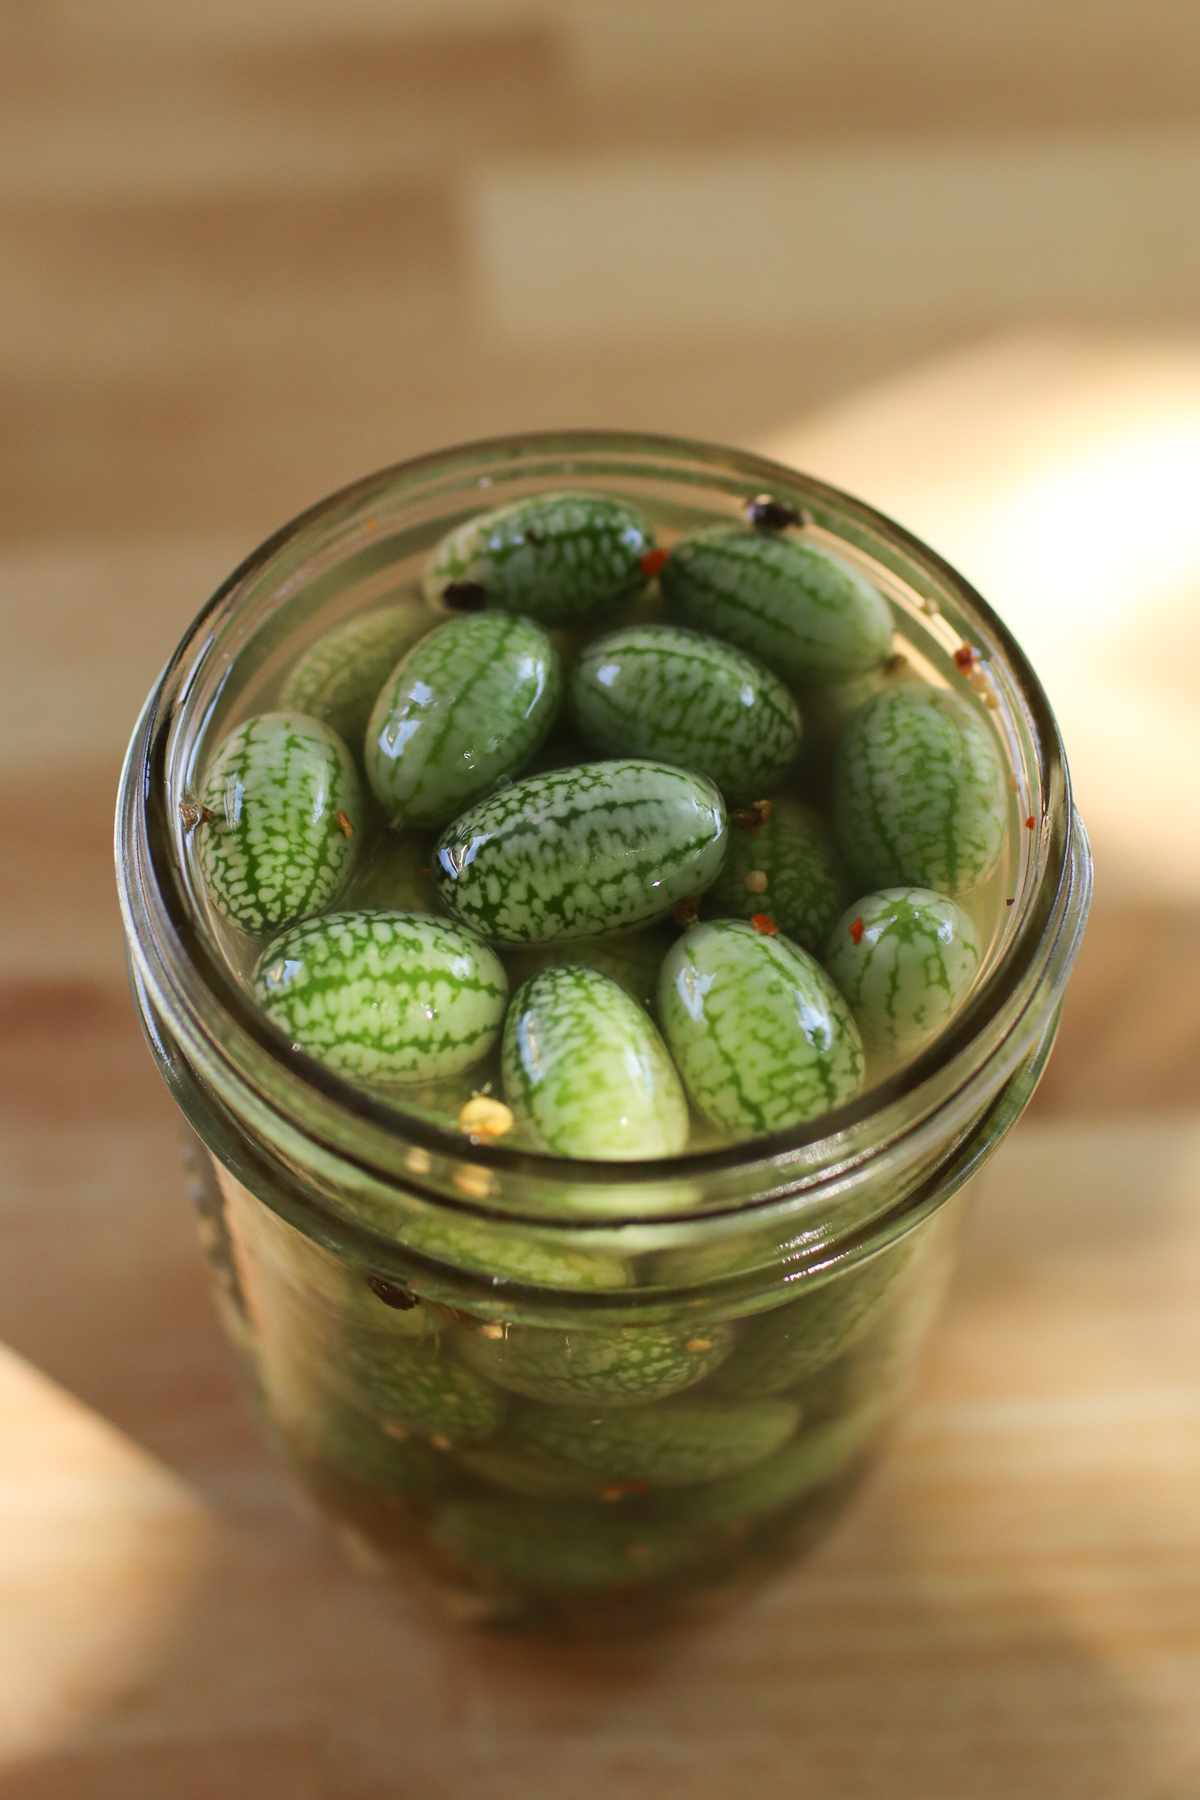
Cucamelons (Melothria Scabra), also called Mexican sour gherkins or mouse melons, are small grape-sized fruits that look like a mini watermelon and taste like a sour, citrusy cucumber. They grow on tiny climbing vines, and the leaves are similar to cucumber leaves. They are crunchy, crisp, and extremely refreshing.
Because cucamelons taste a lot like cucumbers, they make excellent dill pickles! This is a fun way to preserve your cucamelons and enjoy a light, refreshing snack.
Why You’ll Love Them
Bite-sized pickles: Cucamelons make the cutest, most snackable pickles! They are fun for older kids (or younger kids if cut into quarters) and charcuterie boards.
Preserve your harvest: Pickling is a fantastic way to preserve garden produce. The vinegar acts as a natural preservative, making pickles that last months, while the fresh cucamelons last a couple of weeks at the most.
Tangy and briny: Cucamelons are a little more tart than cucumbers, which makes a tangy and delicious pickle!
Easy to make: Homemade pickles are so quick to whip up, and so satisfying!
Ingredients
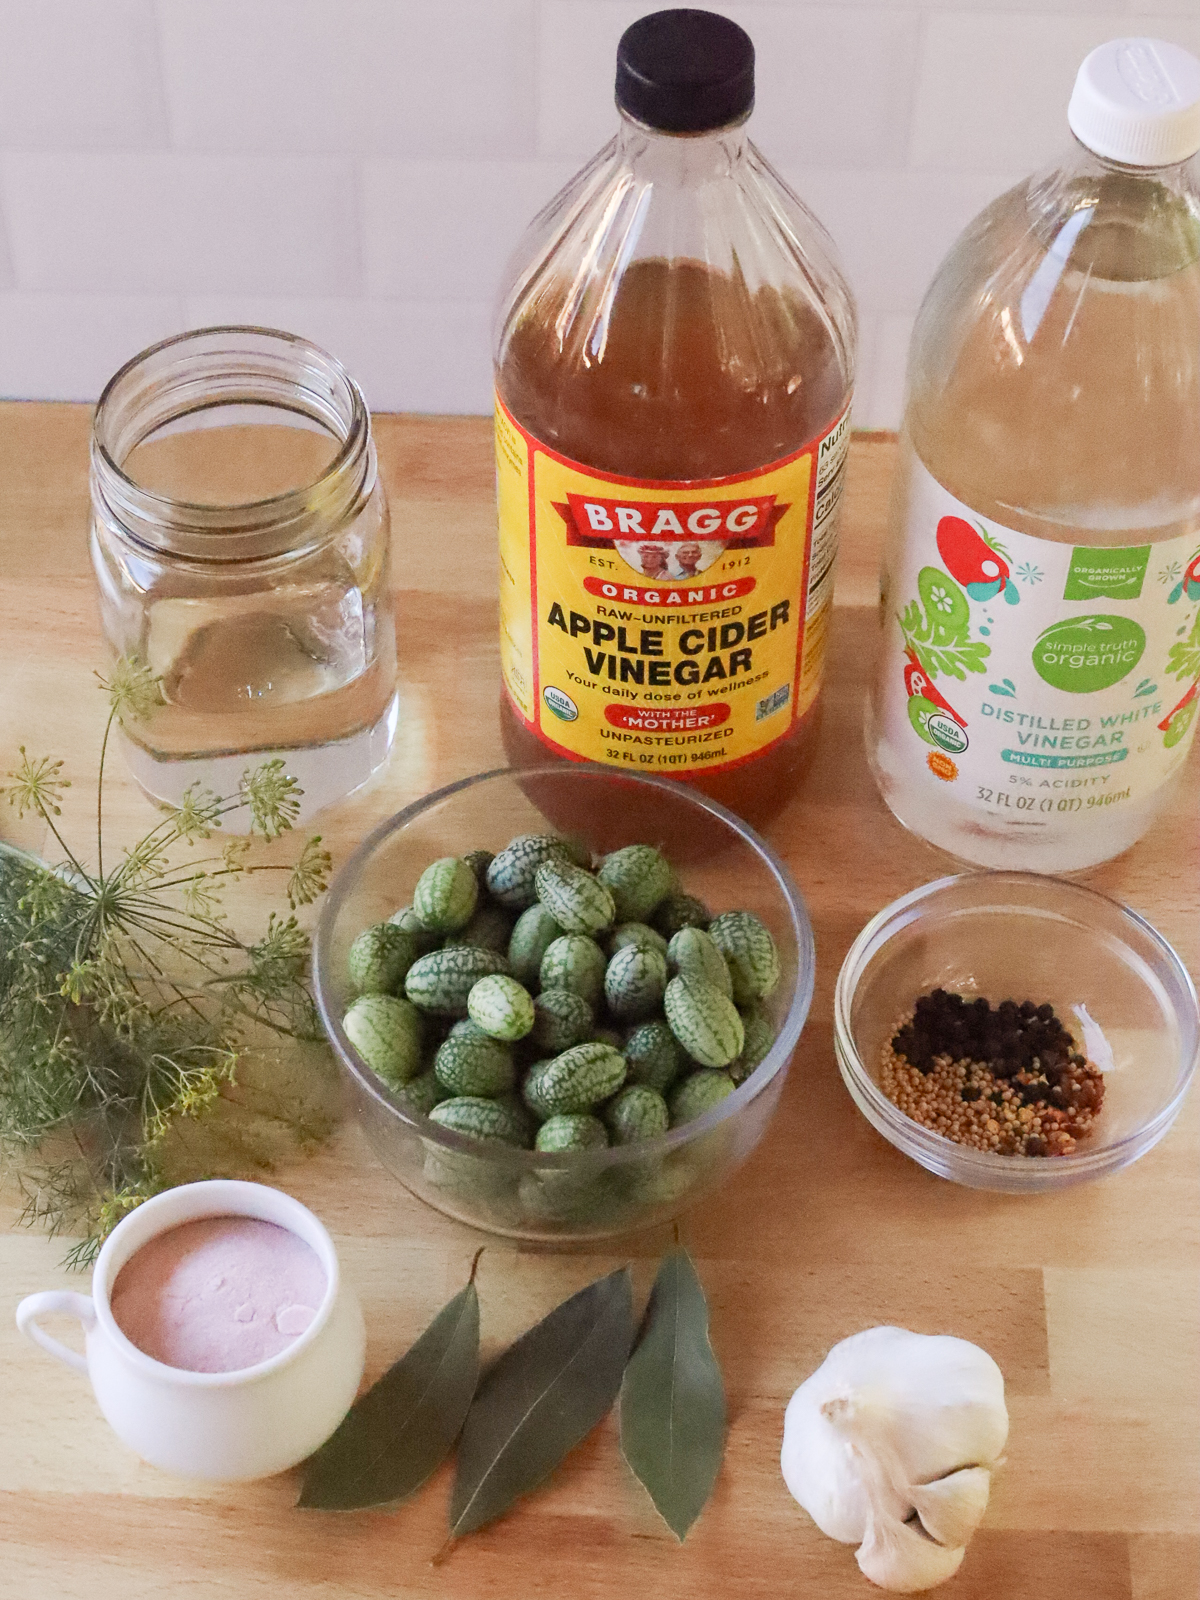
- Cucamelons: You can grow your own or buy them from the farmer’s market. I have never seen cucamelons at the grocery store, but if you find them, then you have a cool grocery store!
- Vinegar: I like the flavor of a combination of apple cider vinegar and white vinegar. If you prefer one over the other, you can certainly stick with just one.
- Salt: I like pink Himalayan salt or Redmond’s Real Salt.
- Pickling spice: I used a combination of black peppercorns and mustard seed. If you have a pre-made mix you like, you can certainly use that.
- Fresh garlic cloves: This adds so much delicious flavor to pickles!
- Fresh dill: Dried dill will work in a pinch, but I recommend opting for fresh if you can.
- Bay leaves: The tannins in bay leaves keep the pickles crisp. You can use grape leaves for the same result.
- Red pepper flakes: An optional ingredient that gives the pickles a little more flavor and a bit of spice.
How to Make Cucamelon Pickles
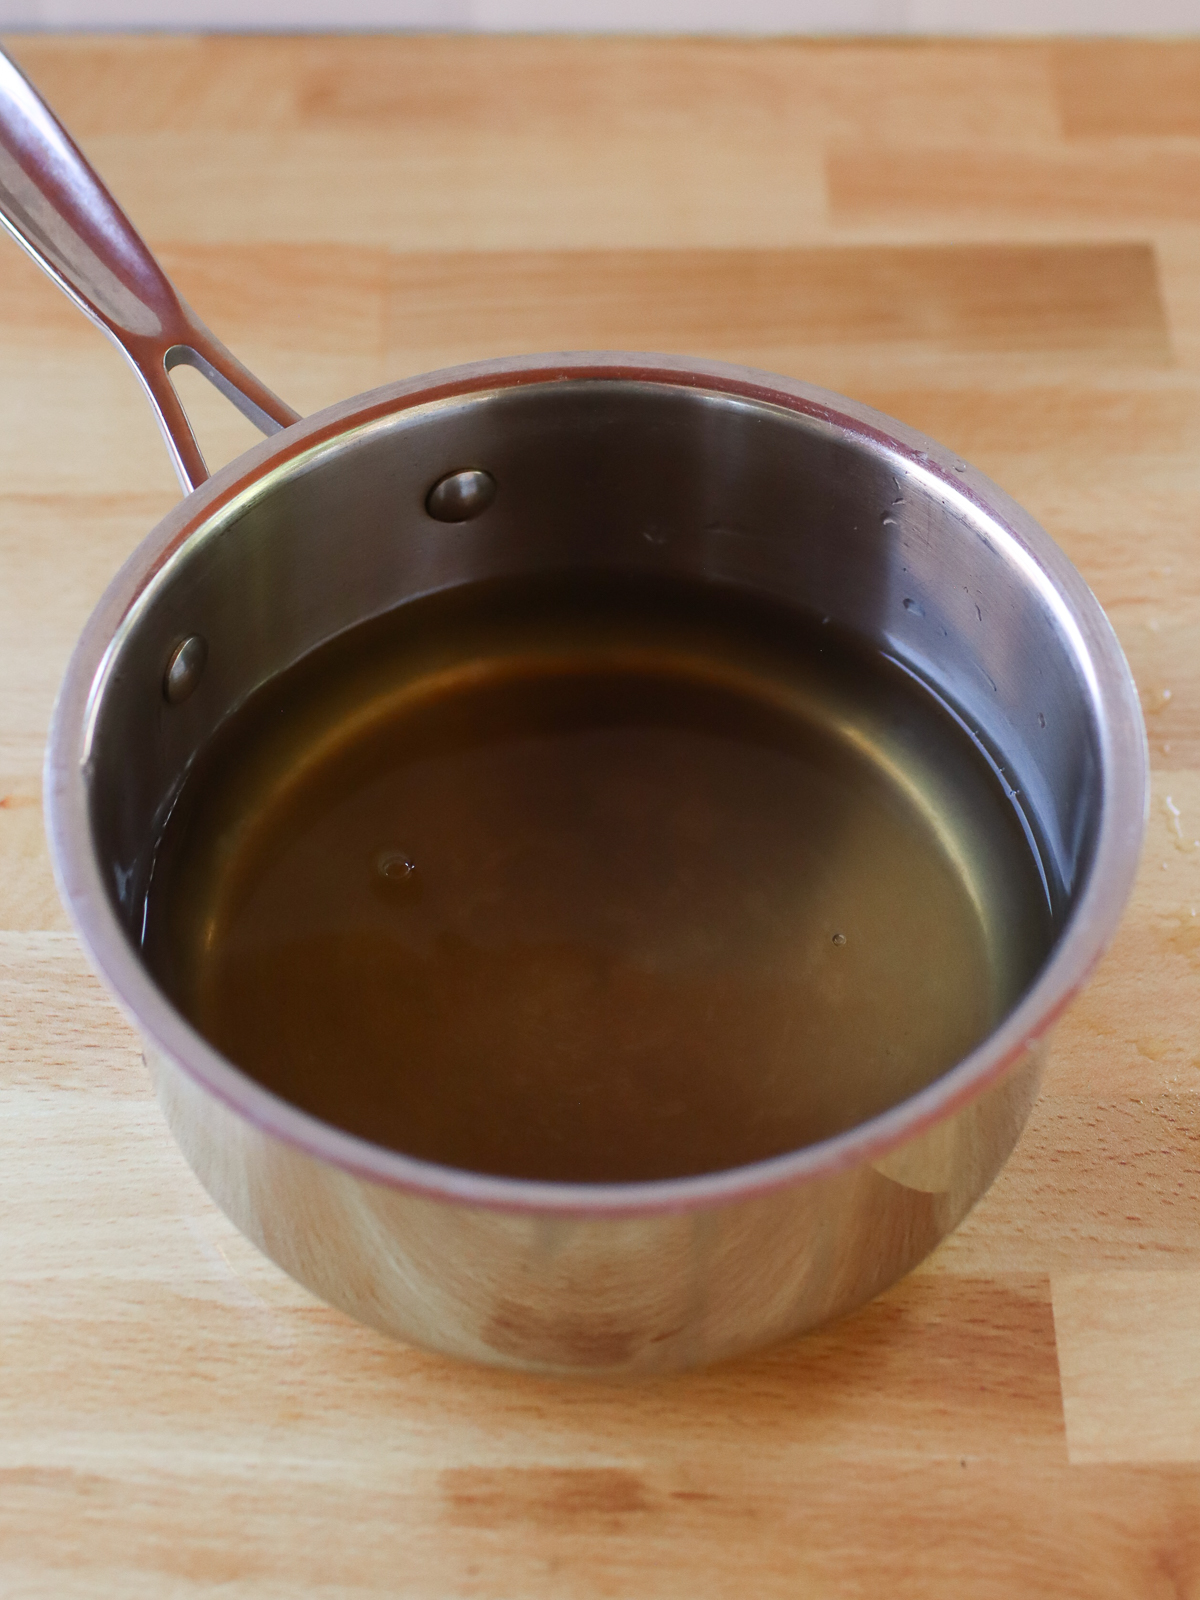
Step 1: Combine the water and salt in a small saucepan and bring it to a boil. As soon as it’s boiling, remove from the heat and stir until the salt is dissolved. Allow it to cool for 15-30 minutes, then add the vinegar.
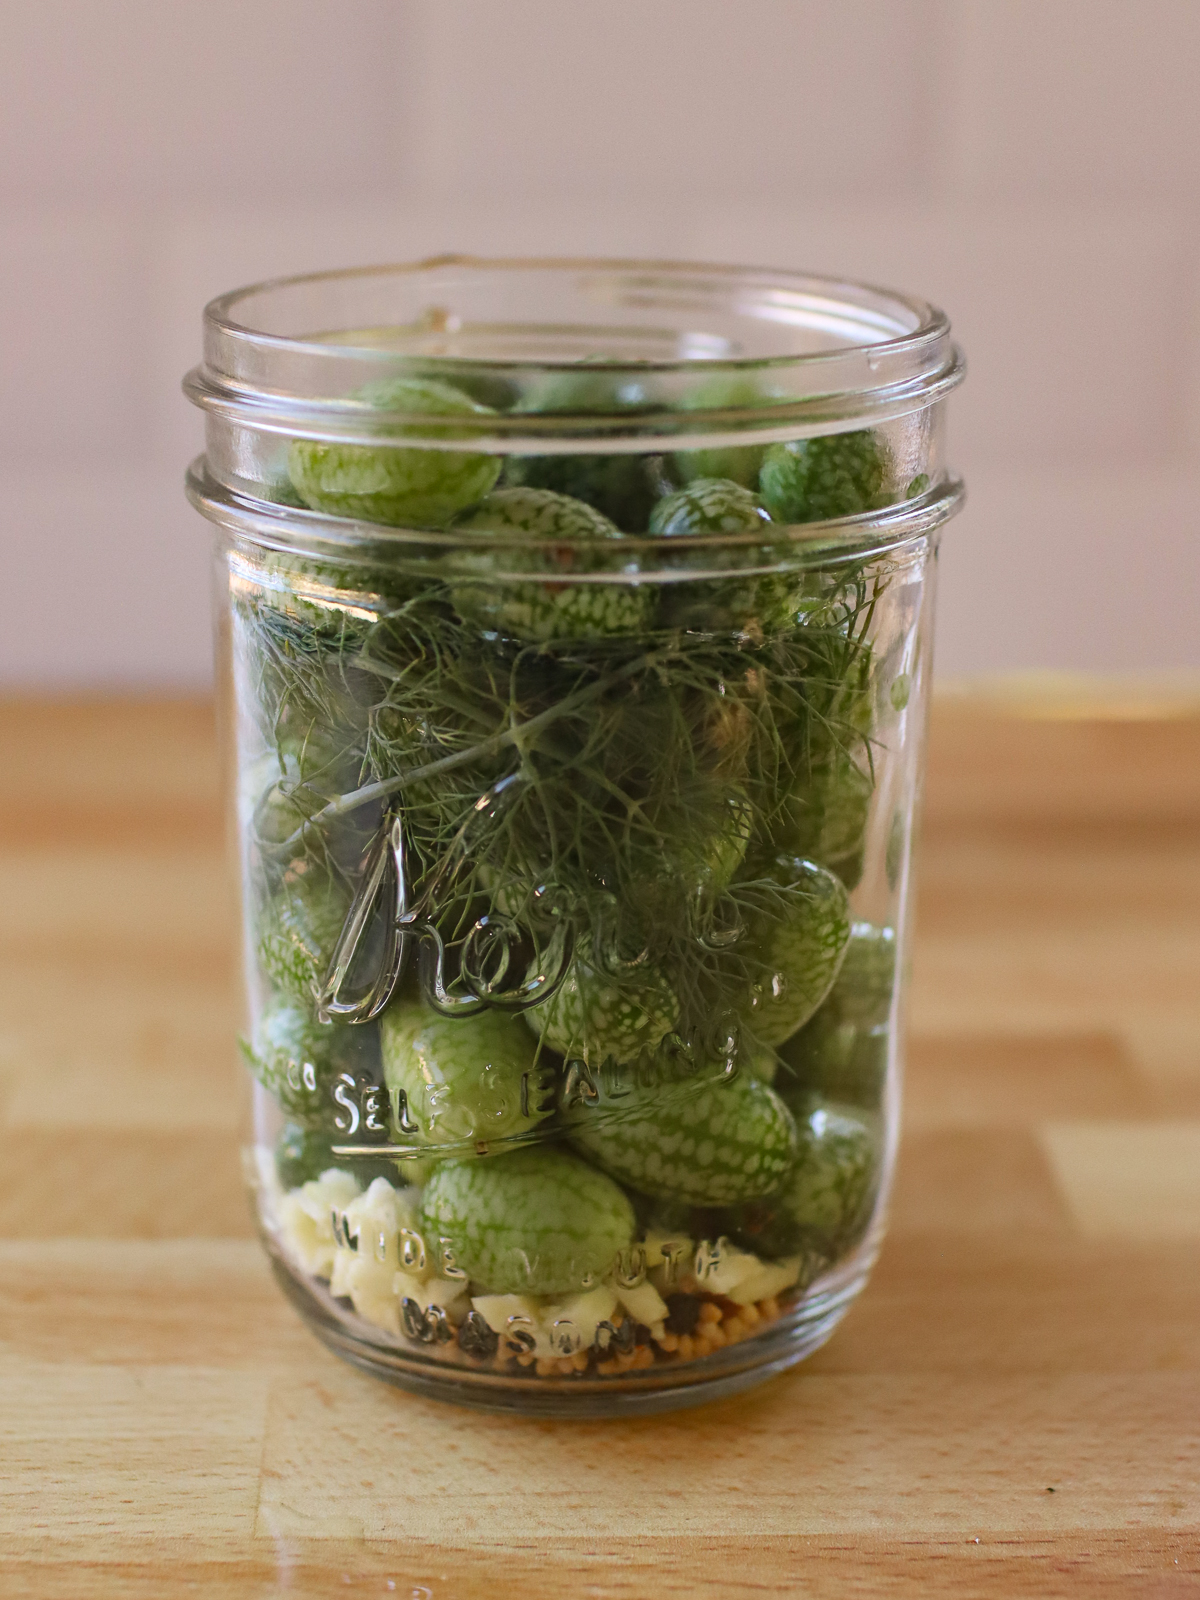
Step 2: Pack the rest of the ingredients into a pint jar.
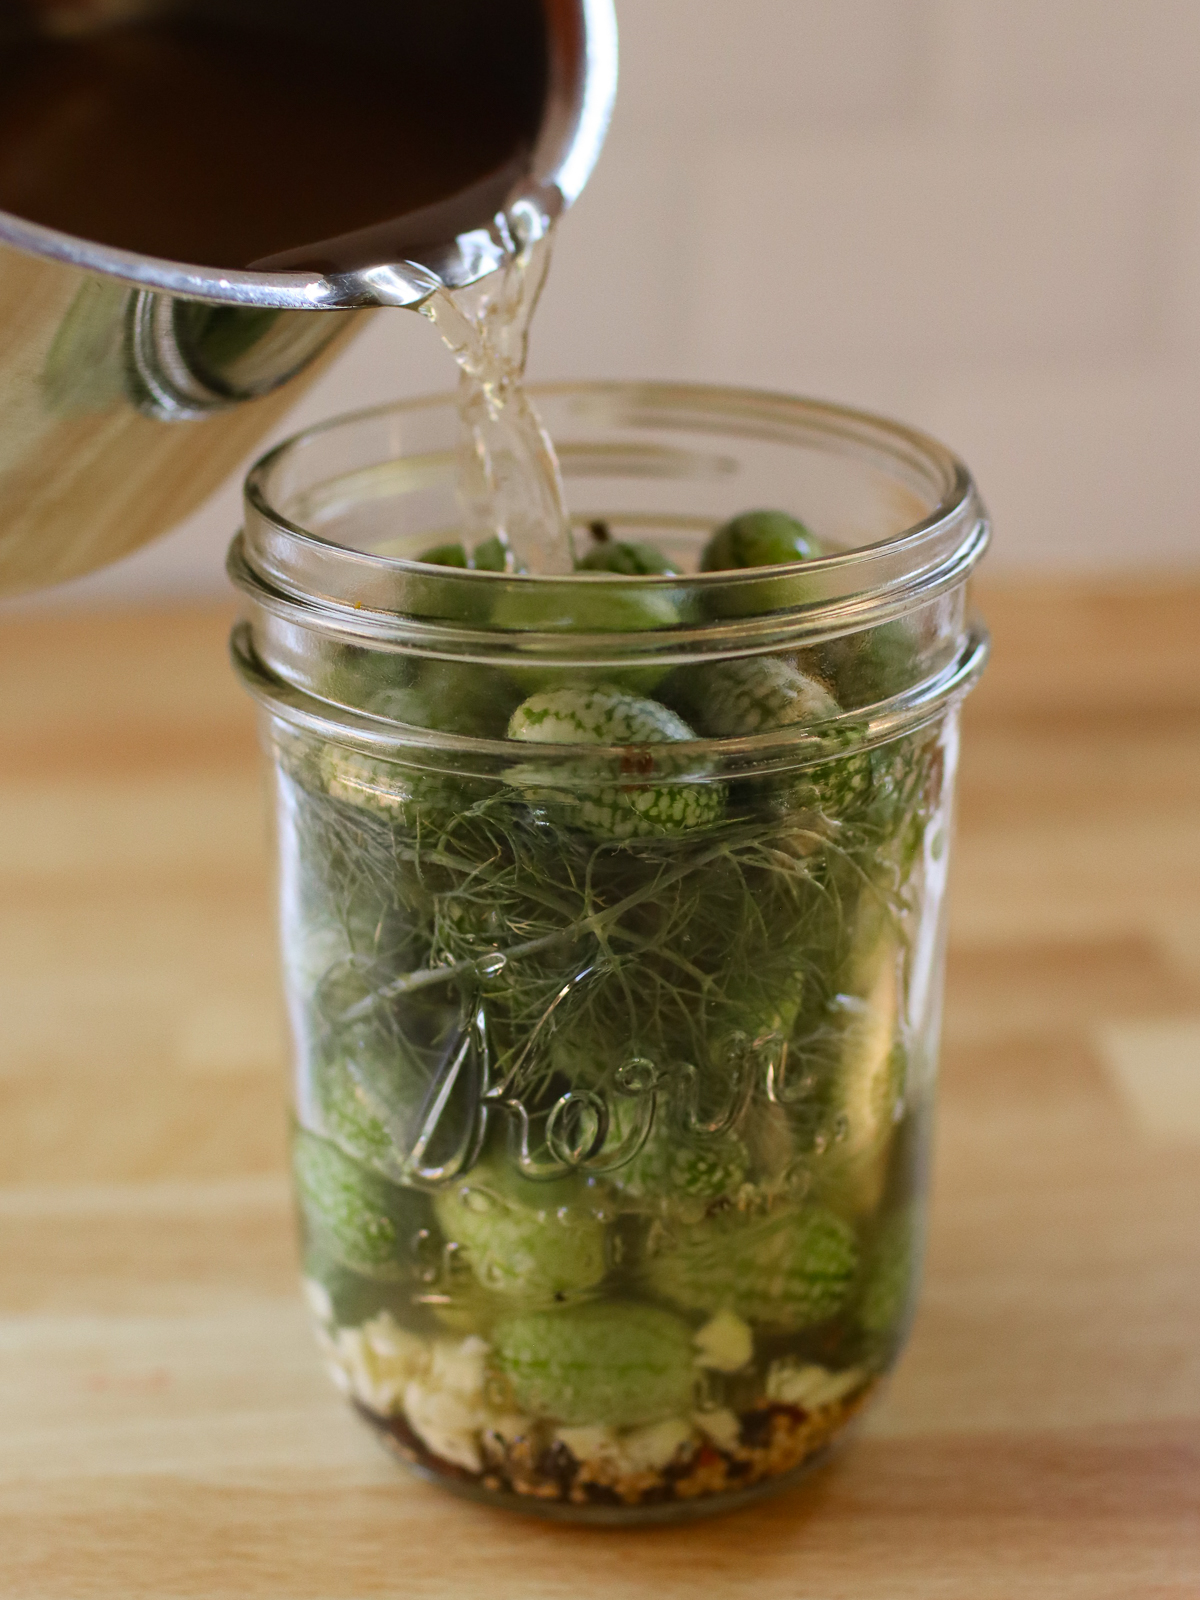
Step 3: Pour the brine over the other ingredients, ensuring everything is completely covered by the liquid.

Step 4: Secure a plastic or glass lid onto the jar. Chill in the fridge for at least a few hours before serving.
Tips
- If you’re in a rush, you can pour the warm brine right over the cucamelons; they’ll pickle faster, but you’ll have less crisp pickles.
- Feel free to add onions to the jar for an added flavor, and pickled onions to enjoy!
- If your cucamelons aren’t as crisp as you’d like, soak them in a bowl of ice water for 15-30 minutes before making your pickles.
- Feel free to chop your cucamelons in half or quarters for smaller pickles. Keep in mind, they will not be as crunchy with this method.
- Make sure you use a plastic or glass lid for your pickles — regular metal canning lids will corrode in the vinegar.
- It’s important to keep everything submerged in the brine to prevent mold from growing on the pickles.
- The longer you let the cucamelons pickle in the fridge, the better they’ll taste! A few hours is the minimum, but for best results, let them pickle for a week before enjoying.
FAQs
While vinegar-based recipes are typically safe to can, this recipe hasn’t been tested for safe canning. I recommend sticking with trusted sources for your canning recipes. Ball or your county extension office are the best places to get recipes!
Homemade pickles last in the fridge for several months! They taste the best within 3 months, though. You can keep pickles indefinitely, just don’t eat them if you observe mold or a foul smell in the jar.
Yes! Just follow my fermented dill pickle recipe and replace cucamelons with the cucumbers in an equal weight.
Cucamelons are great for snacking, adding to salads, using in cocktails and infused water, or making into salsa! Anything you like to use cucumbers for will be delicious with cucamelons.
I buy mine from Botanical Interests and start them indoors in the spring.
Related Recipes
🥒Enjoy the seasonal flavors of summertime with this easy pickle recipe! If you try these pickled cucamelons and love them, I’d love it if you come back and leave a review. Thanks for visiting!
Cucamelon Pickles
Equipment
- Small saucepan
- 16-ounce mason jar with a plastic or glass lid
Ingredients
- 1 ½ cups cucamelons (210 grams)
- ½ cup water
- ¼ cup apple cider vinegar
- ½ cup white vinegar
- 1 ½ tsp salt
- 1 tsp peppercorns
- 1 tsp mustard seeds
- 2 large cloves garlic chopped
- 2 bay leaves
- 3 sprigs of dill
- Pinch red pepper flakes
Instructions
- Combine the water and salt in a small saucepan and bring it to a boil. As soon as it’s boiling, remove from the heat and stir until the salt is dissolved. Allow it to cool for 15-30 minutes, then add the vinegar.
- Pack the rest of the ingredients in a mason jar, then pour the brine over to fully cover the cucamelons. Chill in the fridge for at least a few hours, but they will taste better if left to pickle for longer.
Notes
- If you’re in a rush, you can pour the warm brine right over the cucamelons; they’ll pickle faster, but you’ll have less crisp pickles.
- Feel free to add onions to the jar for an added flavor, and pickled onions to enjoy!
- If your cucamelons aren’t as crisp as you’d like, soak them in a bowl of ice water for 15-30 minutes before making your pickles.
- Feel free to chop your cucamelons in half or quarters for smaller pickles. Keep in mind, they will not be as crunchy with this method.
- Make sure you use a plastic or glass lid for your pickles — regular metal canning lids will corrode in the vinegar.
- It’s important to keep everything submerged in the brine to prevent mold from growing on the pickles.
- The longer you let the cucamelons pickle in the fridge, the better they’ll taste! A few hours is the minimum, but for best results, let them pickle for a week before enjoying.


These salty, crunchy mini pickles are the best summer snack! So refreshing and delicious! I can’t get over how adorable and tasty cucamelons are.