Easy Fermented Dill Pickle Recipe: Quick & Crunchy

These lacto-fermented dill pickles are the best pickles you’ll ever have! With lots of dill and garlic, these tangy, salty pickles are packed with flavor and gut-healthy bacteria.

Fermenting cucumbers is an easy and delicious way to preserve them. The unique, tangy flavor of fermented pickles is out of this world and they have some added benefits for your microbiome.
With only a few minutes to get started and a little patience while they ferment, you will have your new favorite pickles that are also great for your gut health!
What are Fermented Pickles?
Fermented pickles are cucumbers that are fermented in a saltwater brine, rather than cooked in vinegar, to pickle and preserve them.
Lacto-fermentation provides the environment for bacteria to break down the sugars in food and convert them into lactic acid. This produces a distinct and desirable flavor with natural carbonation. Traditional sauerkraut is a common example of lacto-fermentation.
Fermenting also preserves food for many months. Fermented vegetables can be kept in the fridge or a root cellar for up to a year. The salt used in Lacto-fermentation allows good bacteria to flourish and kills harmful bacteria that can cause spoilage.
Fermentation has been used for ages to preserve fresh produce, but it has recently become popular again due to its pleasant flavor and potentially beneficial probiotics. Fermented food is alive with all kinds of beneficial bacteria that feed your microbiome and promote gut health.
This post contains affiliate links. If you make a purchase through the links, I will earn a small commission at no cost to you. As an Amazon Associate, I earn from qualifying purchases. Read my full disclosure here.

Equipment
Fermenting does require a bit of equipment to get started. Having the proper tools for lacto-fermentation ensures that your food stays free of mold while it ferments.
- Fermentation weight or spring: These press the pickles down so they are fully submerged under the brine. The pickles need to be kept out of oxygen to prevent harmful mold from developing. I use springs because that’s what I like for most fermentation recipes, but glass weights are a bit better for pickles.
- Fermentation lid: These are jar lids that have one-way valves on them. The valves allow gas that’s formed during fermentation to escape without letting air in the jar.
- Mason jars: A wide-mouth quart jar will fit this recipe perfectly. I often like to make double batches with a 2-quart jar.
- Kitchen scale: This recipe measures a lot of the ingredients by weight for accuracy. This is because the ratio of salt to water is important in fermentation and volumetric measurements leave a lot of room for variance. There are a lot of inexpensive scales on the market that work perfectly for this.

Ingredients
Cucumbers: You can grow your own cucumbers, purchase them from the farmers market, or get them at a grocery store. Pickling cucumbers or gherkins are the best type of cucumber for fermentation because they maintain their shape and crunch well and they are an ideal size. If you are buying your cucumbers from the grocery store, I recommend opting for cocktail cucumbers or mini Persian cucumbers.
Peppercorns, red pepper flakes, and mustard seed: These are spices that add a complex and delicious flavor to your pickles. You can adjust the spices based on your preferences. They even sell premade pickling spice at the store if you want something easier.
Pickling salt: This is a crucial part of fermentation, so make sure you get the right type of salt. You can substitute Pink Himalayan salt or sea salt. Do not substitute iodized table salt and don’t alter the amount of salt in the recipe. The salt used for this is the proper amount to keep the bad bacteria from growing in your fermented pickles. Cutting back on the salt could cause harmful bacteria and mold to grow in your pickles.
Dill: I prefer to use fresh dill in this recipe (learn how to start an herb garden), but if that’s not an option, you can substitute 4 teaspoons of dried dill.
Garlic cloves: This adds to the delicious flavor of these fermented pickles! If you prefer, you can reduce or omit the garlic, but I recommend giving it a try as it’s so tasty.
Grape leaves or bay leaves: These contain tannins that keep the pickles crisper. If you want a good crunch in your fermented pickles, don’t skip out on this ingredient. I like to use fresh grape leaves when I can, but dried bay leaves from the spice cupboard work perfectly as well.
Food-Grade Calcium Chloride: This is an optional ingredient that will make your pickles extra crispy. If you prefer super crunchy pickles, try adding calcium chloride to maintain the crunch of a fresh cucumber.

How Long to Ferment Cucumbers
The fermentation time depends on the air temperature and your preference.
After 3-5 days you can typically see signs of fermentation, but the pickles usually taste the best around 2 weeks. I suggest you do a taste test every few days after the first week until they are your desired sourness.
Once you like the flavor, pop the jar into the fridge. This will drastically slow the fermentation process and maintain the flavor you like until you eat the pickles.

Salt Brine Salinity
Calculating the salinity for a lacto-fermentation brine is crucial to having a successful ferment. For pickles, the best salinity is 3.5%, which means that the amount of salt is 3.5% of the amount of water and pickles by weight. If you alter the amount of cucumbers or water in this recipe, be sure to calculate how much salt to use according to that recipe.
How to Make Fermented Pickles
Making fermented pickles is very easy and doesn’t take long to get started. It simply requires a little patience while the pickles ferment.
Begin by preparing your cucumbers. Give them a good rinse and remove the blossom end (it contains an enzyme that causes mushy pickles). Get the cucumbers soaking in an ice water bath for 15 – 30 minutes while you prepare the brine.

To make the brine, add the water, salt, garlic, and spices to the jar and attach a regular lid to it. Shake for 1-2 minutes or until the salt is completely dissolved. If you are using calcium chloride, dissolve that in the brine as well.
Using clean hands, pack the cucumbers and dill into the jar with the salt water brine. To make this easier, I like to pour the brine into a separate jar while I get the pickles situated.

Once the cucumbers, dill, and brine are all in the jar, make sure that the cucumbers are fully submerged.
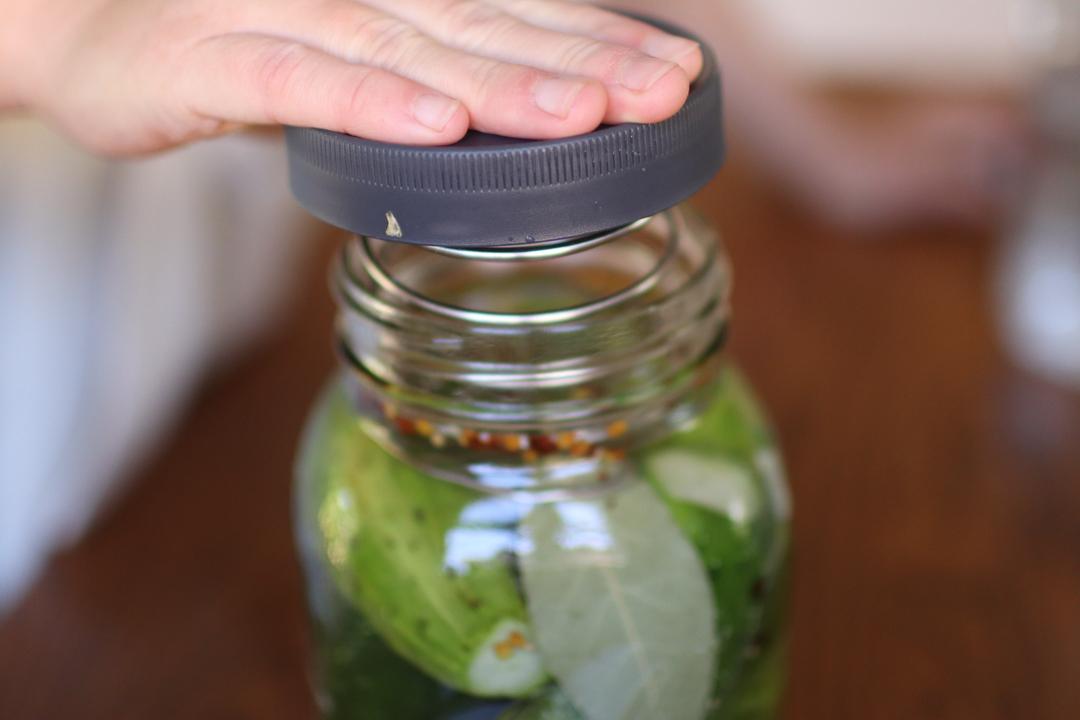
Place a fermentation weight or spring on top of the pickles to keep them submerged as they ferment, then top the jar with a fermentation lid.
Store your jar in a cool, dark place until fermented. You’ll notice the brine gets cloudy and bubbles form while the pickles are fermenting; this is completely normal.
Start tasting your pickles after a week has passed and allow them to ferment until they are the flavor you prefer. They will get more sour the longer they ferment. You can leave them to ferment for up to 4 weeks.
Mold in Fermentation
As your pickles ferment, you may notice a thin, white substance develop on the surface of the brine. This is called kahm yeast and it’s completely safe and normal.
If you notice mold of any other color, or white mold that looks raised or fuzzy, throw the whole batch of pickles away. This isn’t common if you’re using the right amount of salt and not letting your pickles ferment for too long, but it can happen on occasion.

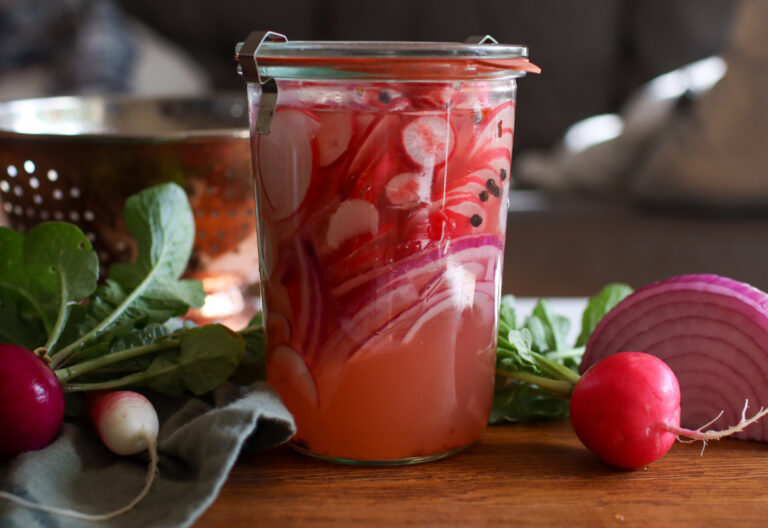
More Delicious Ferments

Fermented Dill Pickles
Equipment
- digital scale
- quart-sized jar
- fermentation weight
- fermentation lid optional – see notes
Ingredients
- 430 g dechlorinated water
- 430 g pickling cucumbers
- 30 g pickling salt
- 4 large cloves of garlic chopped
- 3 sprigs of fresh dill foliage and flowers
- 3 fresh grape leaves or bay leaves
- 1 Tbsp mustard seeds
- 1 Tbsp black peppercorns
- 1 tsp red pepper flakes optional
- ¼ teaspoon food-grade calcium chloride optional, see notes
Instructions
- Remove the blossom end of your cucumbers and place them in a large bowl with ice water.
- Add water, salt, garlic, spices, and grape or bay leaves to a clean mason jar. Secure the lid and shake for 1-2 minutes until the salt is dissolved. If you are using calcium chloride, add that to the brine as well.
- Using clean hands, pack the cucumbers and dill into the jar with the salt water brine. To make this easier, I like to pour the brine into a separate jar while I get the pickles situated.
- Once the cucumbers, dill, and brine are all in the jar, make sure that the cucumbers are fully submerged.
- Place a fermentation weight or spring on top of the pickles to keep them submerged as they ferment, then top the jar with a fermentation lid.
- Place jar somewhere out of direct sunlight and allow it to ferment at room temperature. You’ll notice the brine gets cloudy and bubbles form while the pickles are fermenting; this is completely normal.
- Start tasting your pickles after a week has passed and allow them to ferment until they are the flavor you prefer. They will get more sour the longer they ferment. You can leave them to ferment for up to 4 weeks.
- Store the finished pickles in the fridge for up to a year.
Notes
- I recommend using distilled or filtered water, but if you only have access to tap water, simply leave the water out on the counter for 24 hours. This will allow the chlorine, which hinders fermentation, to dissipate.
- For extra crispy pickles you can dissolve ¼ teaspoon of food-grade calcium chloride into your pickle brine. This is a completely optional step; I’ve made many batches without it. However, it does make for much crunchier, crisper pickles.
- If you can’t find fresh dill, 4 teaspoons of dried dill will work.
- You can skip the fermentation lid, but you will need to burp the pickles every day or so by opening the lid to release built-up gas.
These pickles are the best pickles I’ve ever had! They are salty, tangy, and crunchy, and I can’t get enough of them.