
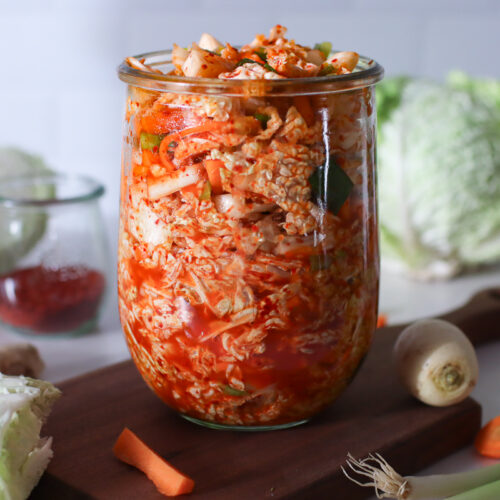
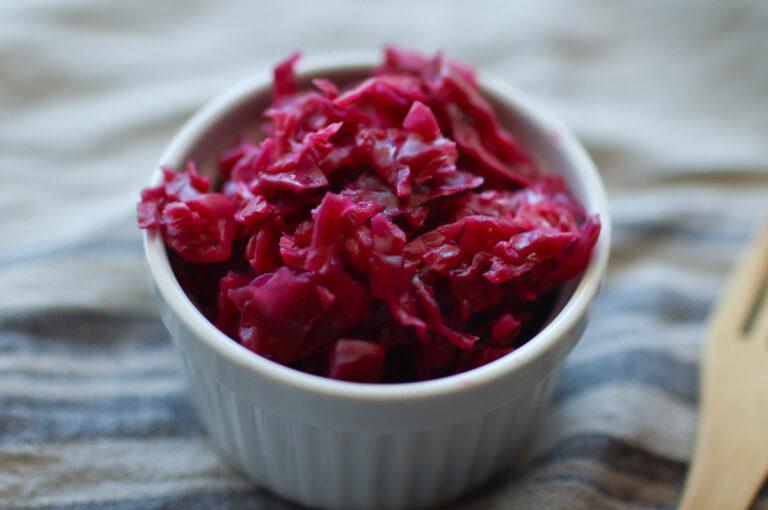
Kimchi-Style Fermented Sauerkraut

Whether you’re an avid kimchi-lover or you’ve never had it, you are going to love this kimchi-style sauerkraut! It combines the spicy, salty, umami flavors of kimchi with the crunch and lightness of sauerkraut. Plus, it’s lacto-fermented, offering loads of gut benefits.

I used to think I didn’t like kimchi – I have no idea what I was thinking!
After I was invited to a “kimchi party” where each member brought a variety of veggies and we all made a unique jar of kimchi to take home, I was hooked. The homemade kimchi that I made at the party was absolutely addictive, and before I knew it, I was scrambling to make another batch!
I’ve been experimenting with different kimchi recipes for the past couple of years since then, and I’ve finally settled on one that I will gladly make again and again.
It doesn’t use the traditional kimchi process of soaking the cabbage in salt water, rinsing it, and mixing it with a rice flour and gochugaru paste, but rather uses a method more similar to homemade sauerkraut and other lacto-fermented vegetables, such as fermented dill pickles.
This kimchi also uses savoy cabbage, which I would describe as a cross between napa cabbage and regular green cabbage. It provides a little more crunch than napa cabbage but has a much more tender, pleasant texture than green cabbage.
If you like fermented foods, you are going to love this kimchi-inspired sauerkraut. It is salty, spicy, tangy, and truly addicting!

This post contains affiliate links. If you make a purchase through the links, I will earn a small commission at no cost to you. As an Amazon Associate, I earn from qualifying purchases. Read my full disclosure here.
Why You’ll Love This Recipe
Flavorful: This kimchi-style sauerkraut has all of the spicy, sour flavor of a good kimchi. It is delicious on its own and adds a splash of flavor to any dish!
Preserve your veggies: One of the many benefits of fermentation is that it preserves fresh vegetables for up to a year! You can grow your own carrots, radishes, and cabbage, then preserve them by making this fermented kimchi.
Gut benefits: Another benefit of fermented veggies — they are full of live, active probiotics that feed your gut microbiome.
Customizable: As long as you follow the basic salinity rules, you can use whatever veggies you want in this recipe! Get creative and use what you have in the fridge.
Ingredients
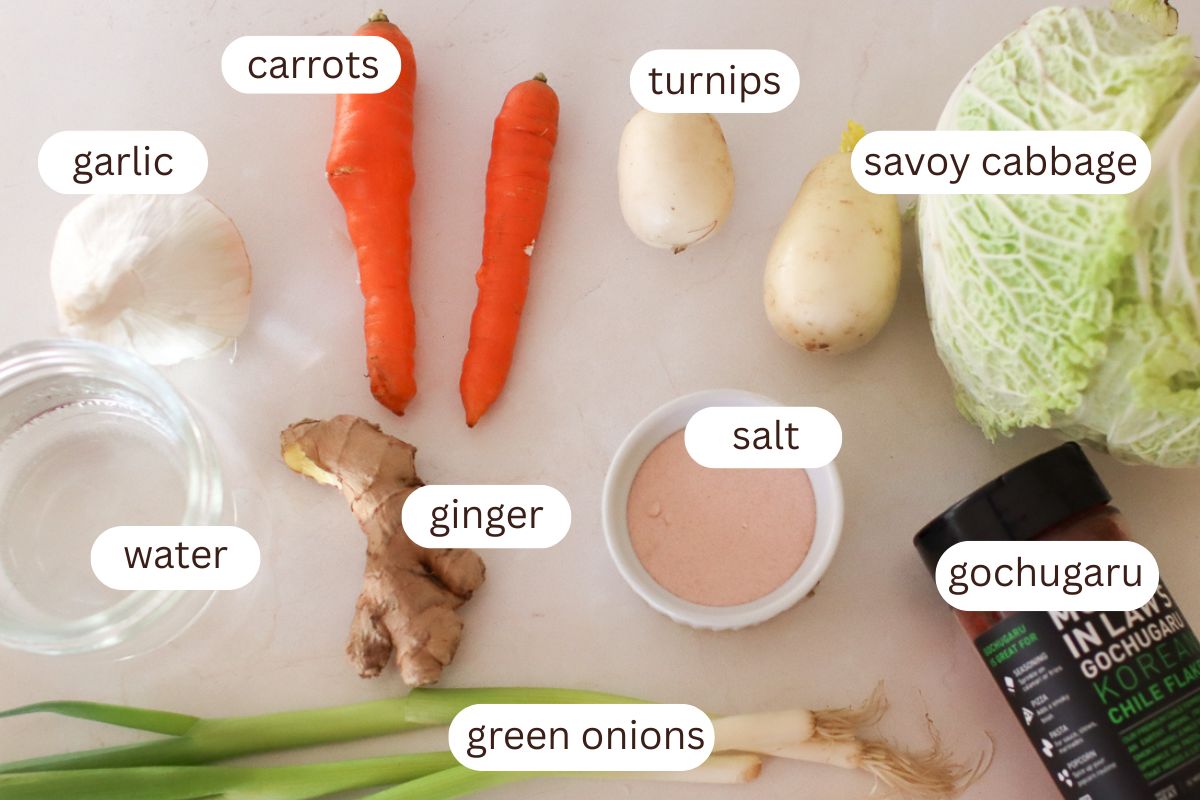
- Savoy cabbage: I’ve tried napa cabbage and green cabbage in this recipe, and I strongly prefer it with savoy cabbage! It is textured and tender like napa cabbage, but it doesn’t get so mushy when it’s fermented. You can substitute any type of cabbage, though.
- Carrots: Give the kimchi a nice, crunchy texture, because they don’t soften as much as the other ingredients.
- Radishes or turnips: I usually use white turnips because I often have a lot of them, but the more traditional choice would be daikon radishes or Korean radishes. Any of them will work!
- Green onions: Also called scallions, these add a lot of oniony flavor to the kimchi.
- Garlic and ginger: Fresh is best and will provide the most flavor! In a pinch, dried will also work.
- Gochugaru: Gochugaru is made of dried Korean chili flakes. I get mine at Whole Foods (look for Mother-in-Law’s brand) or at Mountain Rose Herbs.
- Salt: Any sea salt will work, but don’t use iodized table salt.
- Water: You want dechlorinated water — this can be filtered or distilled, or you can let it sit out for a couple of days so the chlorine dissipates.
Equipment Needed
- Kitchen scale: Weighing your ingredients is recommended to get a precise salinity and prevent mold and bacteria growth in your ferments.
- Jar: I really like the Weck 1-liter tulip jars for this recipe, but you can also use a quart mason jar.
- Fermentation weight: Glass fermentation weights help to keep everything submerged under the brine, which is critical to preventing mold from ruining your kimchi.
- Fermentation lid: This is optional, but it can be helpful for keeping bacteria out while still allowing gas to release. You can also set a lid on your jar without the band or use a Weck jar without the gasket and clamps.
How to Make Kimchi Sauerkraut

Step 1. Combine the ingredients: Combine all of the ingredients, including the water, in a large bowl.

Step 2. Mix the ingredients: Mix well, kneading the cabbage with your hands. Allow it to sit and wilt for about 30 minutes.
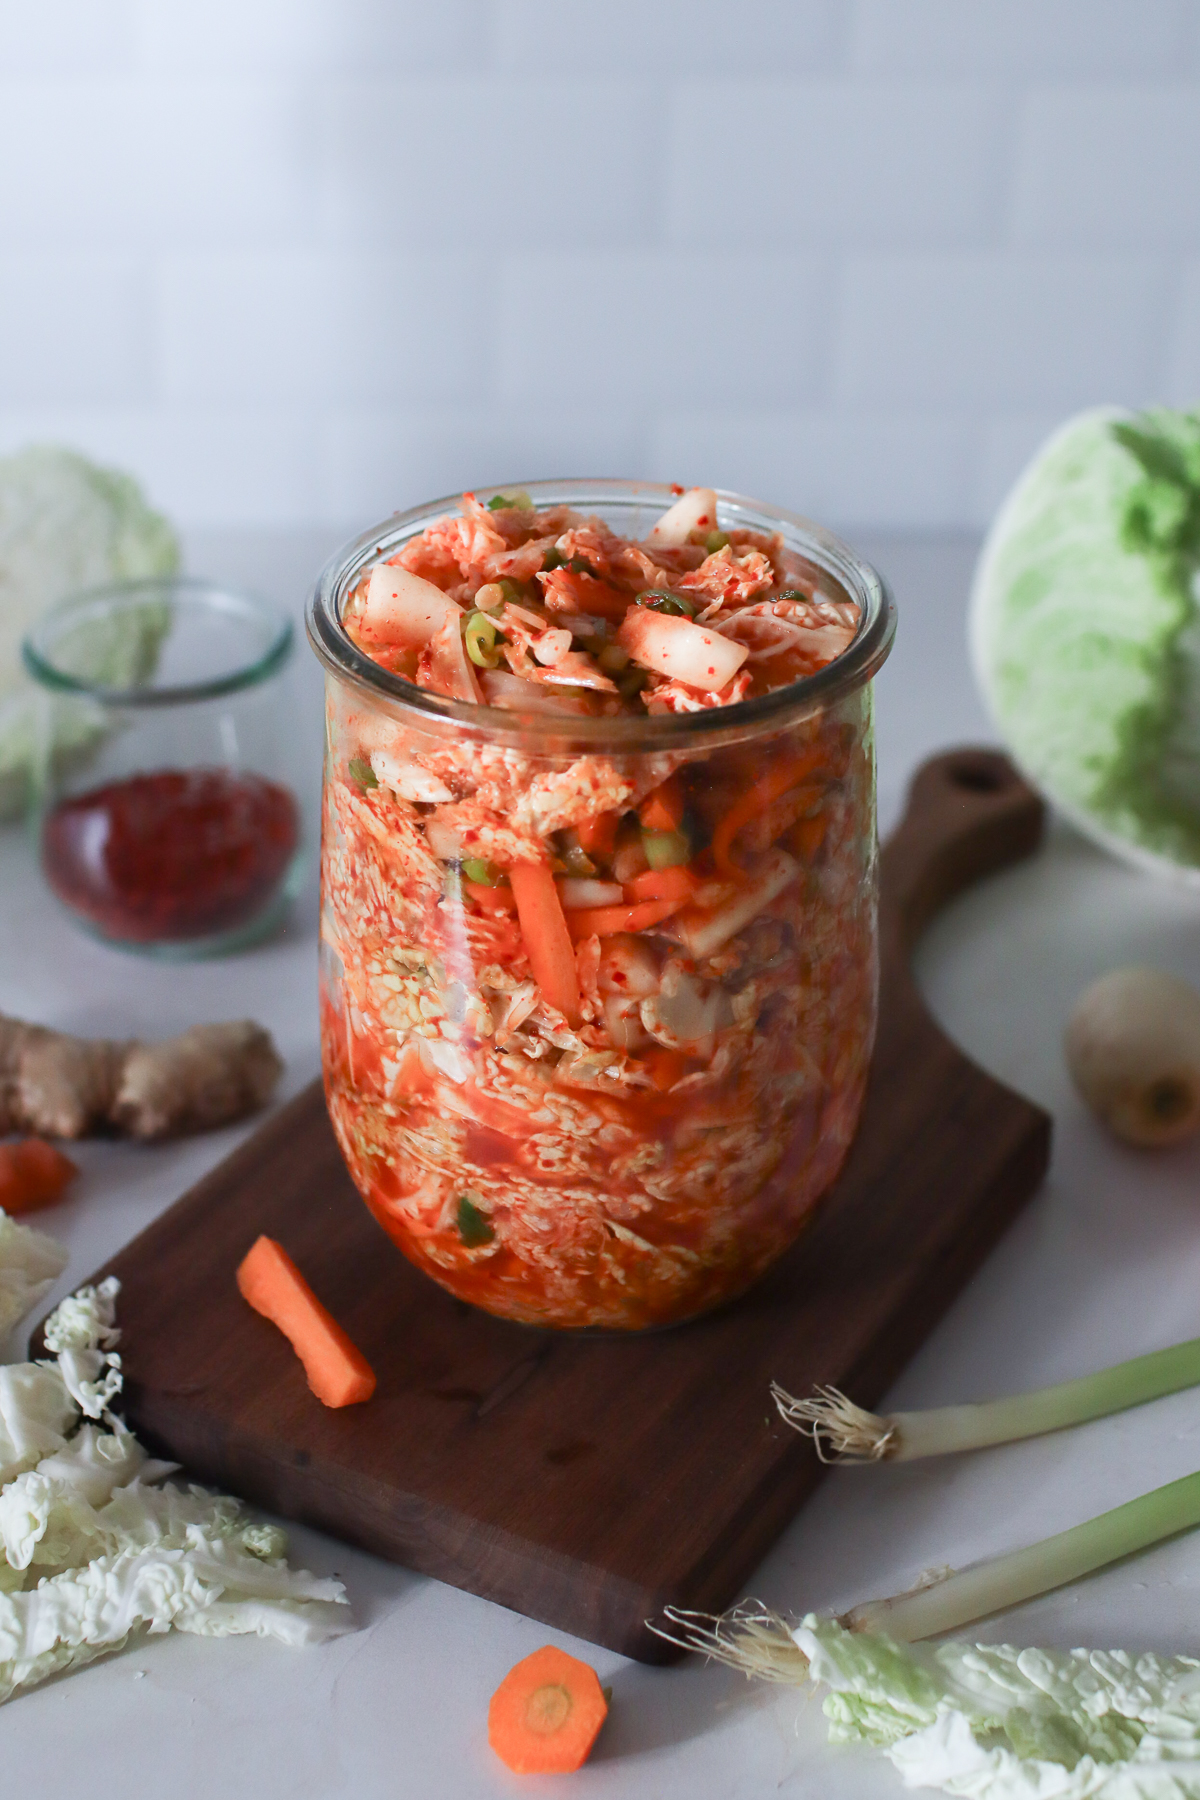
Step 3. Pack the jar: Pack the veggie mixture in a jar, pressing down to make it fit and to submerge the veggies under the brine. Pour the remaining liquid into the jar, making sure to scrape the bowl to get any salt or chili flakes that are left behind.
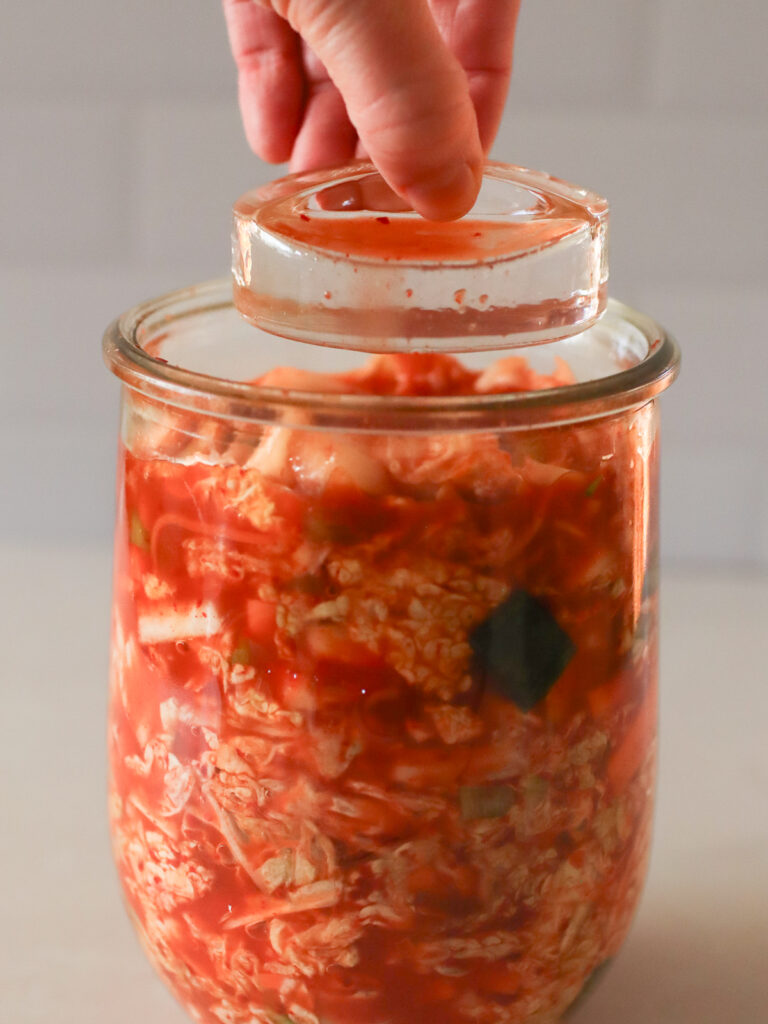
Step 4. Set the weight: Set the weight on top, making sure everything is submerged under the brine.

Step 5. Secure lid: Place the lid on the jar. If it’s a fermentation lid, you can secure it. If you are using a weck jar, don’t clamp the lid on.
Step 6. Ferment: Allow the kimchi to ferment at room temperature for 2-4 weeks. Taste it regularly to decide when it’s done, based on how tangy you like it.

Step 7. Store: Once the kimchi sauerkraut reaches your desired flavor, switch to an airtight lid and transfer the jar to the fridge. You can remove the fermentation weight, but make sure your cabbage remains covered by the brine to prevent mold.
Kimchi vs. Sauerkraut
Kimchi is a very broad term in Korean cuisine — it can mean a variety of vegetables prepared in a variety of ways, the most common being lacto-fermentation.
The most well-known type of kimchi is baechu-kimchi, which is salted and fermented napa cabbage with gochugaru, green onions, ginger, and other ingredients. That’s what this recipe is inspired by!
Sauerkraut, on the other hand, is always lacto-fermented cabbage. While it can have other ingredients, sauerkraut most often has just two ingredients: cabbage and salt.
This kimchi-style sauerkraut uses a similar brining process that we use for homemade sauerkraut, but it includes some ingredients you usually see in kimchi, like green onions, gochugaru, root vegetables, ginger, and garlic. It has a very similar flavor to kimchi, but it’s more crunchy and a bit simpler to make!
Tips for Making Kimchi Sauerkraut
- I recommend using organic ingredients whenever possible.
- This recipe uses 2.5% salinity. If you want to use different vegetables, just swap them out gram for gram with other vegetables in the recipe.
- Store your kimchi sauerkraut in the refrigerator once it’s done with the initial ferment. It will last around a year if everything remains submerged under the brine.
- It’s important to have everything submerged under the brine while it’s fermenting to prevent mold from growing. You can put a whole cabbage leaf over the top to hold down floaters if needed. If you find mold on your kimchi, unfortunately, it’s recommended to toss it and start over.
- During the first few days of fermentation, the jar will likely overflow. I recommend keeping it on a baking tray or bowl to catch the liquid that spills out.
FAQs
The only way to know is to go by taste. Do you like how sour and tangy it is, or does it just taste like salty cabbage? There’s no right or wrong answer here; it just depends on whether you like the flavor.
Yes, you can, though I would avoid it if possible. The fresh garlic and ginger add so much more flavor!
This depends on the temperature of your home and how tangy you like it. Warmer temperatures will ferment it faster and vice versa. I recommend tasting it after two weeks, but I usually go closer to 3-4 weeks.
Yep! You can definitely use napa cabbage in this recipe if you prefer.
This kimchi-style sauerkraut will last in the fridge for about a year, as long as the vegetables remain submerged under the brine.
More Fermented Recipes
🌶️ Enjoy the tangy, salty joy of fermented foods with this easy recipe! If you try this kimchi-style fermented sauerkraut and love it, I’d love it if you come back and leave a review. Thanks for visiting!
Kimchi-Style Fermented Sauerkraut
Equipment
- 1-liter Weck jar or a quart-sized mason jar
Ingredients
- 440 g savoy cabbage chopped
- 50 g green onions chopped
- 60 g carrots julienned
- 30 g turnips or daikon radish sliced
- 12 g garlic minced
- 7 g ginger minced
- 2 T gochugaru chili flakes
- 200 g water filtered or dechlorinated (see notes)
- 20 g sea salt don't use iodized table salt
Instructions
- Mix the ingredients: Combine all of the ingredients, including the water, in a large bowl and mix them well, kneading the cabbage lightly with your hands. Allow it to sit and wilt for about 30 minutes.
- Pack the jar: Pack the veggie mixture in a jar, pressing down as needed to make it all fit and to submerge the veggies. Pour the remaining liquid into the jar, making sure to scrape the bowl to get any salt or chili flakes that are left behind.
- Set the weight: Set the weight on top, making sure everything is submerged under the brine.
- Secure lid: Place the lid on top. If it’s a fermentation lid, you can secure it. If you are using a weck jar, don’t clamp the lid on.*
- Ferment: Allow the kimchi to ferment at room temperature for 2-4 weeks. Taste it regularly to decide when it’s done, based on how tangy you like it.
- Store: Once the kimchi sauerkraut reaches your desired flavor, switch to an airtight lid and transfer the jar to the fridge. You can remove the fermentation weight, but make sure your cabbage remains covered by the brine to prevent mold.
Notes
- *Important: During the first few days of fermentation, the jar will likely overflow. I recommend keeping it on a baking tray or bowl to catch the liquid that spills out.
- You want dechlorinated water — this can be filtered or distilled, or you can let it sit out for a couple of days so the chlorine dissipates.
- I recommend using organic ingredients whenever possible.
- This recipe uses 2.5% salinity. If you want to use different vegetables, just swap them out gram for gram with other vegetables in the recipe.
- Store your kimchi sauerkraut in the refrigerator once it’s done with the initial ferment. It will last around a year if everything remains submerged under the brine.
- It’s important to have everything submerged under the brine while it’s fermenting to prevent mold from growing. You can put a whole cabbage leaf over the top to hold down floaters if needed. If you find mold on your kimchi, unfortunately, it’s recommended to toss it and start over.


This kimchi sauerkraut is one of my all-time favorite foods! I seriously eat it every single day. It’s so salty, tangy, savory, and spicy.