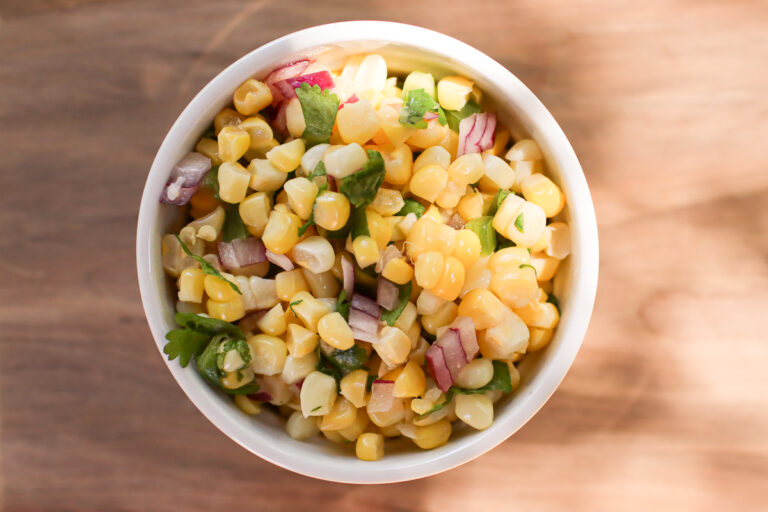
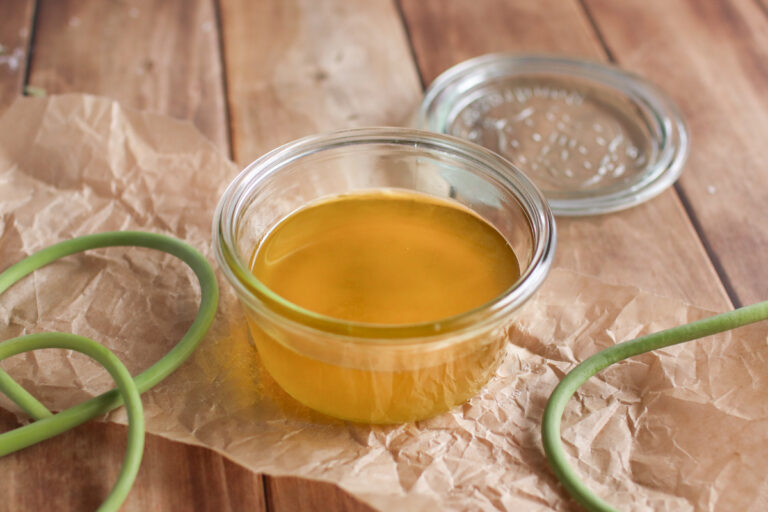
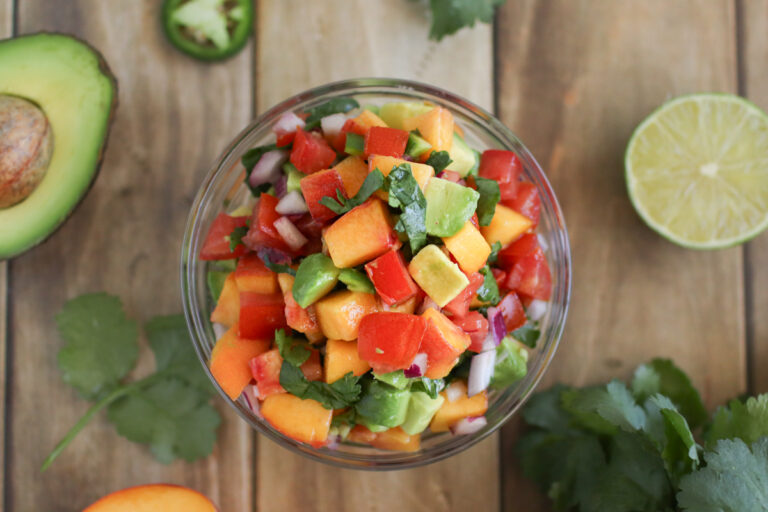
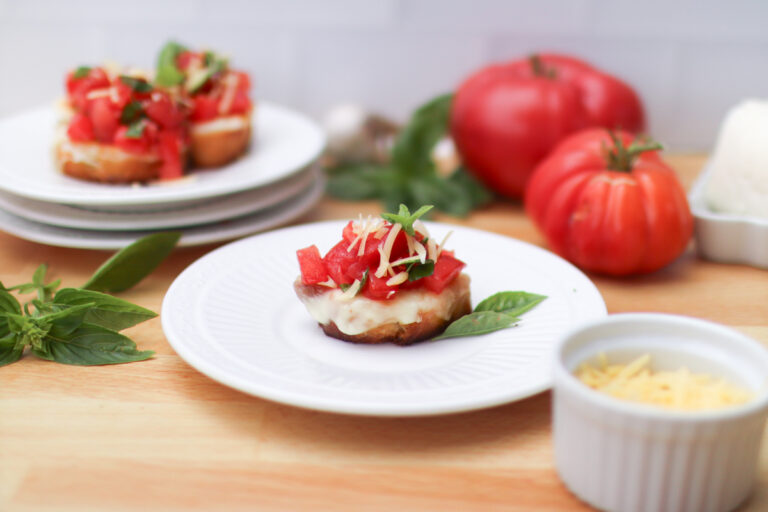
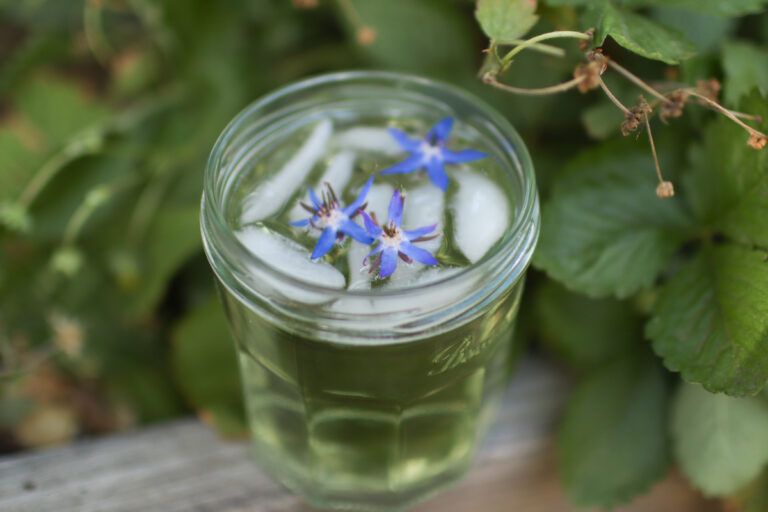
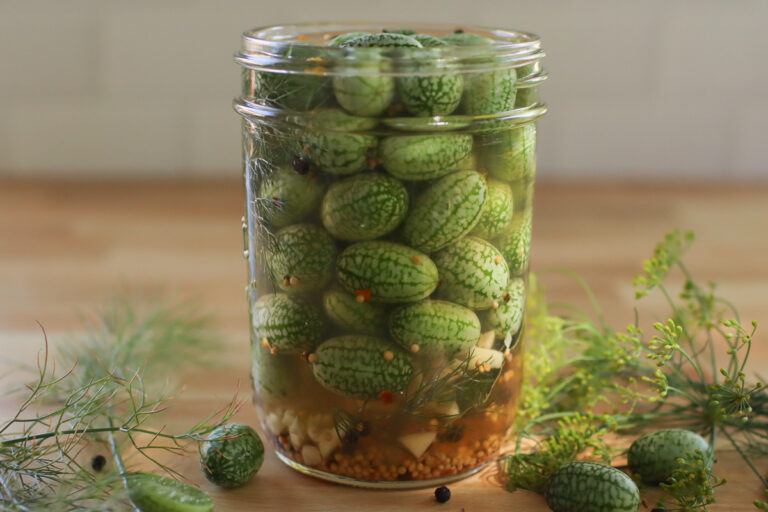
Best Blackberry Bourbon Smash: Whiskey Cocktail Recipe

Best Blackberry Bourbon Smash: Whiskey Cocktail Recipe

Make happy hour special with this blackberry bourbon smash! This refreshing cocktail is the perfect drink for late summer. With sweet blackberries, oaky bourbon, and just a touch of lemon and mint, this well-balanced drink is a crowd-pleaser. 

It doesn’t get better than blackberry season! This time of year, I like to see just how many ways I can enjoy this seasonal delight. During the day that means blackberry iced tea but when happy hour rolls around, you can’t go wrong with a blackberry cocktail.

This delicious fruity cocktail is refreshing, flavorful, and visually appealing. It comes together in just a few minutes and is perfect for a hot summer day!

Why You’ll Love It

Flavorful: This cocktail is a bit of a detour from my regular clear liquor cocktails and I love how the flavor of the bourbon mixes with the juicy blackberries. The honey blackberry syrup, lemon, and mint complement each other perfectly for one well-rounded beverage.

Easy: I love a simple cocktail with very few steps to make it! This blackberry bourbon smash is super easy and comes together in just a couple of minutes.

Beautiful: It’s hard to beat the color of this blackberry bourbon smash! Colorful cocktails just taste better. Toss in a couple of garnishes and you have the most beautiful cocktail!

looking down on a blackberry bourbon smash

What’s a Bourbon Smash?

A bourbon smash is a cocktail containing bourbon, mint, lemon, simple syrup, and sometimes a bit of soda water. Oftentimes, bourbon smashes will contain another fruit, like this blackberry smash. You may notice that bourbon smashes are very similar to a mint julep, but the incorporation of lemon and other fruit is what sets them apart. 

This post contains affiliate links. If you make a purchase through the links, I will earn a small commission that helps me continue to provide gardening content. As an Amazon Associate, I earn from qualifying purchases. Read my full disclosure here.

Ingredients

Bourbon: Grab your favorite bourbon so you love this drink even more. Keep in mind that high-quality bourbon will always taste better.

Lemon: Fresh lemon juice adds the acidity and brightness we love in a good cocktail! Feel free to substitute fresh lime juice if you like. 

Blackberries: Fresh blackberries are best, but you can also use thawed frozen blackberries. 

Simple syrup: I recommend using this delicious blackberry syrup for cocktails, but you can also use regular unflavored syrup or any liquid sweetener you prefer (maple syrup is delicious).

Mint: You can use homegrown mint leaves or buy fresh mint at the grocery store. Be sure to grab an extra mint sprig for a garnish!

Seltzer water: This is optional, but I much prefer to add it. Make your own seltzer water with a SodaStream or buy canned. 

pouring cocktail into a glass

What Kind of Ice for a Bourbon Smash?

Crushed ice is the traditional choice for a bourbon smash. If you don’t have a crushed ice function on your refrigerator, you can run it through a blender or smash it in a plastic bag. There are also many unique ice trays on the market for cocktails, like this pebble ice tray or this ice ball tray.

How to Make It

Toss fresh mint leaves in a cocktail shaker and muddle them to release the oil (and the flavor!). 

Add the blackberries and lemon wedges and muddle some more. Once your lemons have released all of their juice and the blackberries are pulverized, you can move on to the next step.

lemons and blackberries in a cocktail shaker before being muddled
lemons and blackberries in a cocktail shaker after being muddled

Add the bourbon, syrup, and a handful of ice cubes to the cocktail shaker with the muddled ingredients. Place the lid of the shaker on top and shake well until the drink is icy cold.

Strain the liquid out of the shaker and into a serving glass. Add fresh crushed ice and a splash of seltzer water.

Garnish with a sprig of mint, fresh blackberries, or lemon slices and enjoy. 

Serving Glass for a Bourbon Smash

The best serving glass for a bourbon smash is a lowball glass (also called a whiskey glass or a rocks glass). You can simply use the juice glasses that come in a glassware set or have a special set of whiskey glasses on hand. Here are a few of my favorite lowball cocktail glasses:

Variations

  • Use another type of fresh berries for a slightly different flavor. Raspberries would be delicious!
  • Make it with fresh lime juice instead of lemon juice. I’ve tried both ways and they are both delicious.
  • Use different seasonal fruit. You can make bourbon smashes with peaches, cherries, mango, and more. 
looking down on a blackberry bourbon smash

Frequently Asked Questions

Can I make this a mocktail?

Sure! If you omit the bourbon, this will be a lovely lemon blackberry mocktail. Feel free to add a splash of fruit juice or ginger ale for even more flavor. 

Can I use store-bought blackberry syrup?

Sure! If you want to make this easy cocktail even easier, you can use blackberry syrup from a bottle. I like this one because it has simple ingredients. 

Do I need cocktail tools to make this?

While a cocktail shaker, muddler, and jigger make this process a bit easier, you don’t need any special equipment to make this cocktail. You can shake the cocktail in a mason jar, muddle with the end of a wooden spoon, and measure with tablespoons (one tablespoon is equal to ½ an ounce).

Yield: 1 cocktail

Blackberry Bourbon Smash

looking down on a blackberry bourbon smash

Make happy hour special with this blackberry bourbon smash! This refreshing cocktail is the perfect drink for late summer.

Prep Time 5 minutes

Ingredients

  • 2 ounces bourbon
  • ¼ lemon, cut into 2-3 wedges
  • 6 large mint leaves, plus more for garnish
  • ¾ ounce blackberry syrup, or to taste*
  • 5 fresh blackberries, plus more for serving
  • Soda water
  • Crushed ice

Instructions

    1. Add mint leaves to a cocktail shaker and muddle with a muddler or a wooden spoon to release the oils.
    2. Add the blackberries and lemon wedges, then muddle more until the blackberries are mashed and the lemon juice is released.
    3. Add bourbon, syrup, and ice cubes to the blackberry mixture and shake well until chilled.
    4. Strain the mixture into a glass and add fresh crushed ice and a splash of soda water to taste.
    5. Garnish with a sprig of mint and a couple of blackberries.

Notes

* You can use homemade blackberry syrup or store-bought syrup.

a blackberry bourbon smash closeup
Easy Pesto Salad Dressing Recipe: Simple Basil Vinaigrette

Easy Pesto Salad Dressing Recipe: Simple Basil Vinaigrette

This simple pesto salad dressing is the perfect vinaigrette for salads, sandwiches, and marinades! It comes together in minutes with just a few ingredients and it’s loaded with flavor. You’ll love adding it to just about everything!

The smell and flavor of fresh basil is just one of those quintessential summer things. Every year when the basil in my garden is going crazy, I love making a huge batch of pesto to use in a variety of dishes. I freeze it, make pasta, slather it on paninis, and make this simple vinaigrette.

If you love pesto, you’ll love this dressing. It combines the basil-y flavor of pesto with the tanginess of white wine vinegar to make a dressing that is versatile and delicious.

Ingredients

Basil pesto: You can use homemade or store-bought pesto for this simple recipe. This easy dressing is a great way to use up leftover pesto!

White wine vinegar: I like white wine vinegar the best, but it’s also tasty with red wine vinegar or apple cider vinegar.

Extra virgin olive oil: Use a quality olive oil for best results. Some inexpensive olive oil is very bitter.

Fresh Lemon Juice: Add a lot of brightness and acidity with freshly squeezed lemon juice.

Parmesan cheese: Use grated parmesan cheese so it doesn’t make the dressing chunky. You can use the shelf-stable variety or fresh grated cheese.

pesto salad dressing being blended
pesto salad dressing after being blended

How to Make Pesto Salad Dressing

If you do not have pesto already made, you will need to start by preparing some homemade pesto. Store-bought pesto can also work. 

 I have a great recipe here made with fresh basil leaves, pine nuts, fresh garlic, parmesan cheese, and extra virgin olive oil. 

To make the dressing, combine all of the ingredients in a glass mason jar. Insert an immersion blender into the jar and pulse it until the dressing comes together. Put the lid on the jar for easy storage.

This post contains affiliate links. If you make a purchase through the links, I will earn a small commission that helps me continue to provide gardening content. As an Amazon Associate, I earn from qualifying purchases. Read my full disclosure here.

​Uses

There are so many tasty uses for this fresh homemade dressing! Try using it one of these ways or anywhere else you think it sounds great.

  • Fresh salads with leafy greens and fresh veggies
  • Cold pasta salads (like this orzo pesto pasta salad)
  • Use for an extra dose of flavor in potato salads
  • Use as a marinade for meats, tofu, or mushrooms
  • Make a Caprese salad with cherry tomatoes, fresh mozzarella, and balsamic vinegar
  • Drizzle it over a sandwich
dressing being poured onto a salad

Frequently Asked Questions

Can I freeze this salad dressing?

I haven’t personally tested freezing the salad dressing, but you can freeze the pesto to have on hand for easy salad dressing later on. Freeze it in an ice cube tray then put the cubes into freezer bags so you can easily grab a small portion to thaw and use.

How do I make this a creamy salad dressing?

If you’re looking for creamy basil pesto salad dressing, follow the recipe as-is but add in a couple of tablespoons of plain yogurt, sour cream, or mayonnaise.

How do I store this salad dressing?

This dressing will be good for over a week if kept in an airtight container in the refrigerator. It should last even longer, just do a smell check and look for mold before using it past the week mark.

What other oil can I use?

If olive oil isn’t your thing, you can use avocado oil in this dressing.

pesto being dropped into a jar of dressing ingredients

Related Recipes You’ll Love

Yield: 1.5 cups

Easy Pesto Salad Dressing

A jar of basil dressing with parmesan, lemon, and basil behind it

This simple pesto salad dressing is the perfect vinaigrette for salads, sandwiches, and marinades! It comes together in minutes with just a few ingredients and it’s loaded with flavor. You’ll love adding it to just about everything!

Cook Time 5 minutes
Total Time 5 minutes

Ingredients

  • 3 tablespoons basil pesto
  • ¼ cup white wine vinegar
  • ¾ cup extra virgin olive oil
  • Juice of ½ a lemon
  • 3 tablespoons grated parmesan
  • Salt and black pepper to taste

Instructions

  1. Combine all of the ingredients in a wide-mouth mason jar.
  2. Insert an immersion blender and pulse it until the dressing is smooth and emulsified. Alternatively, run the dressing through a regular high-speed blender.
  3. Store in the refrigerator and use on salads, sandwiches, and veggies.
homemade basil pesto vinaigrette in a jar
The Best Vegetarian Guacamole: Easy Homemade Recipe

The Best Vegetarian Guacamole: Easy Homemade Recipe

This homemade vegetarian guacamole is zesty, flavorful, and so easy to make! With creamy smashed avocado and loads of delicious vegetables, you’ll love dipping just about anything in this tasty guac!

Ingredient List

Avocados: As the main ingredient in this homemade guacamole, you’ll want to choose great avocados. The best avocados are a bright, pale green color inside and are soft when squeezed but not overly squishy. 

Red onion: Mince it finely to infuse the guacamole with the flavor without overpowering it.

Jalapeno peppers: Remove the webbing and the seeds to get the flavor of the peppers without a lot of spice. For a spicy guacamole, you can add in some of the seeds.

Bell peppers: I like adding just a bit of bell peppers to my guac for extra crunch and a touch of sweetness.

Cilantro: I love the flavor this adds, but if you are one of the crowd who finds cilantro to taste like soap, you can skip it or use different fresh herbs.

Lime juice: This is an essential ingredient as it adds a delicious flavor and helps prevent the avocado from browning quickly. Use freshly squeezed juice, not bottled.

Roma tomatoes: Finely dice the tomatoes and remove their seeds before tossing them in the fresh guacamole.

ingredients for guacamole: avocado, pepper, jalapeno, onion, tomato, lime, and cilantro

Variations

  • Use white onion instead of red onion for a less sweet guacamole
  • Try substituting the lime juice for lemon juice. I do this on occasion when I’m out of limes and I’m always delighted by the different flavor!
  • Add spices like chili powder or cumin to your guac if you want some added flavor
  • Experiment with mashing the avocados less to make a chunky guacamole or mashing them a lot to have an extra-smooth guacamole. Both ways are delicious in their own right.

Serving Suggestions

There are so many different ways to enjoy this easy guacamole recipe! Vegetarian guacamole is the perfect dip or topper to add delicious flavor to your dishes. Here are my favorite ways to enjoy it:

  • Scoop it with your favorite tortilla chips for a salty, flavorful snack. Add mango pico de gallo to the side too!
  • Serve on top of tacos with black beans, sour cream, and salsa
  • Smeared onto a piece of toasted sourdough to make a zesty avocado toast
  • Atop all of your favorite Mexican-inspired dishes. I, in particular, love enchiladas with a big scoop of veggie guacamole and a dollop of sour cream!

How to Make Ahead

Guacamole is really best served fresh, but you can make it ahead by a couple of days. 

To make guacamole that you won’t be serving immediately, first, make it without the lime juice. Transfer the prepared guacamole into an airtight container that is taller and skinnier, so it has less surface area. Squeeze the lime juice on top of the guacamole to finish. This creates a barrier that prevents air from touching the guac, which is what causes browning. 

If you are saving leftovers and the lime juice is already in the guacamole, you can add more lime juice, use plastic wrap, or use a thin layer of water instead.

Guacamole can be kept in the fridge for about 2-3 days. If you want to prep ahead even further, I recommend having the ingredients chopped and ready but mashing your avocados at the last minute. After a couple of days, avocado gets brown and the flavor changes.

scooping avocado out of its skin into a bowl

Frequently Asked Questions

Can vegetarians eat guacamole?

Yes, most of the time, guacamole is vegetarian. Because it is primarily made up of avocados, herbs, and vegetables, there is not meat to worry about. On occasion, you’ll find guacamole with bacon in it. Dairy products are more common but they are suitable for a vegetarian diet.

Is guacamole vegan?

Guacamole is typically vegan, but it does occasionally have dairy products and sometimes meat. It’s best to check the ingredient lists to be sure it does have feta cheese, cotija cheese, mayo, or sour cream. 

What can I use in guacamole instead of cilantro?

If you are part of the crowd to whom cilantro tastes like soap, you aren’t alone. You can simply skip the cilantro in your guacamole and it will still taste delicious. You can also substitute other fresh herbs like parsley or basil. 

What vegetables go best with guacamole?

Guacamole is the perfect dip for veggies if you need a healthy snack! The vegetables that go best with guacamole are celery, cucumbers, carrots, broccoli, blanched asparagus, or radishes. Pretty much every vegetable is delicious with a big scoop of guacamole, so don’t be afraid to try different ones.

a chip scooping up guacamole

More Vegetarian Recipes You’ll Love

Yield: About 2 cups

Vegetarian Guacamole

A bowl of guacamole with a tomato and lime

This homemade vegetarian guacamole is zesty, flavorful, and so easy to make! With creamy smashed avocado and loads of delicious vegetables, you’ll love dipping just about anything in this tasty guac!

Cook Time 10 minutes
Total Time 10 minutes

Ingredients

  • 3 large avocados
  • 2 tablespoons red onion, minced
  • 2 tablespoons jalapeño, minced
  • ¼ cup bell peppers, diced
  • ¼ cup Roma tomatoes, diced
  • 1 tablespoons cilantro, minced
  • Juice of 1 lime
  • Sea salt and black pepper to taste

Instructions

  1. Begin by slicing the avocados in half and removing the pits. Scoop out the avocado flesh into a large mixing bowl and mash it with a potato masher or a fork.
  2. Add the remaining ingredients and stir well to combine. Add salt and pepper to taste.
  3. Serve with tortilla chips or fresh vegetables.

Notes

If you are not serving the guacamole immediately, make it without the lime juice, transfer it to an airtight container, and squeeze the lime juice onto the surface of the guac. This will create a barrier that blocks air from touching your guacamole to prevent browning. When you are ready to serve it, stir the lime juice into the guac.

delicious veggie guacamole being scooped up with a chip
Fresh Mango Pico de Gallo: Easy & Delicious Salsa Recipe

Fresh Mango Pico de Gallo: Easy & Delicious Salsa Recipe

Add a tropical twist to your classic salsa. This mango pico de gallo is sweet, tangy, and spicy. With lots of fresh fruit and vegetables and even more flavor, you’ll want to eat this all the time!

This is the best mango pico de gallo. The combination of sweet mango, spicy jalapeño, and fresh tomatoes makes a wonderful medley of flavors in one colorful package.

I love serving this tasty salsa at any sort of party or dinner because it is unique, beautiful, and so tasty! 

Why You’ll Love It

  • This delicious salsa is packed with nutritious veggies and fruits. I love a delicious snack that’s also healthy!
  • With simple ingredients and a simple process, this salsa couldn’t be easier to make. You’ll have it done in under 10 minutes.
  • If you need a great side dish, it doesn’t get better than chips and mango pico de gallo. It is colorful, flavorful, and sure to be a crowd-pleaser.
  • It’s perfect for summer! With all of the fresh ingredients and zesty flavors of summer, this salsa is perfect to have on repeat all season long.
  • This fresh salsa is so versatile. You can add it to so many different dishes for a sweet and tangy flavor addition.
a hand holding a chip full of mango pico de gallo

Ingredients

Mangoes: Fresh mangoes are best but frozen work well too. Be sure that your fresh mango is very ripe and juicy. If you’re using frozen, allow them to thaw in the refrigerator first. 

Tomatoes: Fresh, juicy Roma tomatoes are the base of a traditional pico de gallo. They compliment the mango well and add a yummy fresh flavor to this version of the salsa.

Peppers: We will add jalapeños and bell peppers to this salsa. They each add a unique flavor. While the jalapeño adds a spicy kick, the bell pepper is sweeter.

Onion: A fresh red onion ties it all together.

Cilantro: This bitter, earthy herb perfectly balances the other flavors in this salsa. If you are not a fan, feel free to leave it out.

Garlic: Just a bit of fresh garlic makes this salsa all the more flavorful.

Lime Juice: Use fresh lime juice whenever possible. Bottled just doesn’t taste as good!

This post contains affiliate links. If you make a purchase through the links, I will earn a small commission that helps me continue to provide gardening content. As an Amazon Associate, I earn from qualifying purchases. Read my full disclosure here.

a hand squeezing half a lime onto a bowl of mango pico de gallo

Supplies

  • Sharp knife
  • Cutting board
  • Large bowl
  • Juicer (optional)

That’s it! This salsa really couldn’t be easier. 

Variations

  • Use fresh lemon juice instead of lime juice.
  • Substitute cherry tomatoes for the Roma tomatoes for a sweeter option.
  • Use white onion instead of red. 

How to Make Mango Pico De Gallo

Once your veggies are washed, remove the seeds and webbing from the peppers. Remove the seeds from the tomatoes and the peel of the mango (if using fresh mango).

Chop the mango, tomato, peppers, onion, and cilantro into small pieces. I aim for ¼ inch cubes or smaller.

Toss all of the ingredients in a large bowl. You can serve it immediately or allow it to develop more flavor in the refrigerator before enjoying your fresh salsa.

a bowl of mango pico de gallo before it is mixed
a bowl of mango pico de gallo after it has been mixed

How to Store Mango Pico de Gallo

This mango pico de gallo will save well in the fridge for 3-4 days. In fact, I think it tastes better the next day! Keep the salsa in an airtight container and you’ll find that the flavors are able to marinate in the fridge. With all of the fresh veggies, however, it doesn’t save for very long. This shouldn’t be a problem though; it never lasts more than a couple of days in my house!

Serving Suggestions

This easy mango pico de gallo is the perfect salsa to have for meals! It is a fantastic side and a flavorful topping on a variety of dishes. Here are my favorite ways to use it:

  • Serve it with a big bowl of tortilla chips for dipping. Don’t forget the guacamole too! 
  • Add a generous scoop to burrito bowls for loads of flavor.
  • Use it as a topping on fish tacos, shrimp tacos, or breaded cauliflower tacos (my favorite vegetarian option!).

More Fresh Summer Recipes

Mango Pico de Gallo

Looking down on a bowl of mango pico de gallo with chips, lime, and a jalapeno

Add a tropical twist to your classic salsa. This mango pico de gallo is sweet, tangy, and spicy. With lots of fresh fruit and vegetables and even more flavor, you’ll want to eat this all the time!

Prep Time 5 minutes
Cook Time 5 minutes
Total Time 5 minutes

Ingredients

  • 1 cup ripe mangoes, diced
  • 1 cup Roma tomatoes, diced
  • 1/4 cup green bell pepper, diced
  • 1 tablespoon jalapeño peppers, minced
  • 2 tablespoons red onion, minced
  • 2 tablespoons fresh cilantro, minced
  • Juice of half a lime
  • 1/2 teaspoon fresh garlic
  • Salt to taste

Instructions

  1. Using a sharp paring knife, remove the seeds and webs of the peppers and the seeds of the tomatoes. Chop the mango, tomatoes, peppers, onion, and cilantro into small pieces (about ¼ inch). 
  2. Toss the chopped ingredients into a large mixing bowl and add the garlic, fresh lime juice, and salt. Give it a good stir until everything is well mixed.
  3. Serve immediately or store in the fridge in an airtight container for up to 4 days.

Notes

For extra-spicy salsa, leave the jalapeño seeds in to give in an extra kick.

the best mango pico de gallo being scooped onto a chip
Fermented Red Cabbage: Easy Homemade Sauerkraut Recipe

Fermented Red Cabbage: Easy Homemade Sauerkraut Recipe

This simple fermented red cabbage is tangy, versatile, and great for your gut health. Preserve your cabbage and have delicious purple sauerkraut for hot dogs, sandwiches, and sides with just a few simple steps.

What is Lacto-Fermentation?

There are a few different types of fermentation, one of the most common being lacto-fermentation. While it sounds like it has to do with milk or lactose, this is not the case. This type of fermentation occurs when bacteria break down the sugars in food and form lactic acid. Popular lacto-fermented foods include fermented pickles, kimchi, and sauerkraut.

a bowl of fermented red cabbage, a fork, and a jar of cabbage

Reasons to Love Homemade Sauerkraut

It tastes way better than most store-bought ‘kraut. A lot of store-bought sauerkraut is cooked down in the canning process, making the flavor and texture lackluster. Making your own sauerkraut preserves the cabbage through the fermentation process, making it as close to fresh as possible. You’ll love the tangy flavor of this fermented red cabbage.

It’s loaded with health benefits. Not only does the good bacteria in fermented foods feed your gut health, but red cabbage is highly nutritious.

It preserves cabbage the old-fashioned way. The amazing thing about lacto-fermented food is it has a fantastic cold shelf life. Fermented food is safe to store at room temperature for some time, though it will continue to ferment. In the refrigerator, it is good for several months! This is amazing compared to the 1-2 weeks life of fresh cabbage.

This post contains affiliate links. If you make a purchase through the links, I will earn a small commission that helps me continue to provide gardening content. As an Amazon Associate, I earn from qualifying purchases. Read my full disclosure here.

Ingredients

  • Red Cabbage: Choose an organic cabbage if possible. 
a hand chopping a red cabbage on a wooden cutting board

Special Equipment

Fermenting does require a few pieces of special equipment and there are a few more that make the recipe easier but are not required. Below is what you’ll need with alternative options. If you want to make it easy on yourself, I love this Ball fermentation kit. With the kit, all you’ll be lacking is a sauerkraut pounder and a scale.

A scale: While you can make sauerkraut with volume measurements, I recommend measuring your ingredients by weight in grams to be the most accurate and prevent moldy sauerkraut.

Fermentation jars or a fermentation crock: This is the container in which your cabbage will ferment. You can use regular glass mason jars or a ceramic crock.

Fermentation lids: If you are fermenting in jars, you will want special fermentation lids. They have one-way valves that allow gases produced during fermentation to escape without allowing air in. I prefer these plastic lids from Ball, but these silicone lids are also a common choice.

Fermentation weights or springs: You will need something to hold your cabbage under the brine to prevent mold. I recommend springs, but glass weights also work. I’ve had luck in the past using river rocks that I boiled to sanitize them, but it is definitely more challenging than the springs or weights.

A sauerkraut pounder: You can use a wooden spoon or just your hands, but a sauerkraut pounder makes this process much easier and gentler on your hands. 

Red Cabbage or Green Cabbage?

Both red cabbage (also called purple cabbage) and green cabbage are nutritious, full of fiber, and tasty. Green cabbage is more typically used for sauerkraut, but purple cabbage is a tasty, colorful, and nutritious alternative. 
Purple cabbage is more nutritionally dense than green cabbage and contains anthocyanins, which are evident in its purple color. Purple cabbage has more vitamin C, vitamin A, and iron than green cabbage. This bright, flavorful vegetable has anti-inflammatory and anti-cancer properties and may promote heart health, to name a few of the many benefits.

a red cabbage and four green cabbages in a crate

Calculating the Salinity for Sauerkraut Brine

Using the correct amount of salt is critical for making fermented cabbage or any fermented vegetable. The salt prevents bad bacteria from growing while allowing beneficial bacteria to flourish, which is what preserves fermented food and makes it great for your gut. 

The salinity requirement for a brine depends on what vegetable is being fermented. The salt concentration for fermented cabbage is 2.5%. 

This means that for every 100 grams of cabbage, you will add 2.5 grams of salt. You can use this percentage to calculate the salt needed for any amount of cabbage, or you can follow the recipe below. 

How Long to Ferment Sauerkraut

As you ferment cabbage, the flavor and texture will change. The ideal range for fermenting sauerkraut is 3-4 weeks, but this will vary based on the temperature of your house. 

I recommend tasting a bit after 21 days, then every couple of days after that to determine when it’s finished fermenting and ready for the fridge.

How to Store Sauerkraut

Sauerkraut should be stored in the refrigerator to drastically slow down the fermentation process and preserve the flavor. Once your sauerkraut is finished fermenting, I recommend removing the spring or weights, tightening an airtight lid onto the jar, and storing it in the fridge. Sauerkraut will keep for several months in the fridge in an airtight container.

shredded cabbage being pounded
shredded cabbage after being pounded for 10 minutes. The cabbage is darker and more tender looking

Expert Tips

  • Give your cabbage adequate massaging and time to release its juices. This will ensure there is enough brine to completely cover the cabbage, which is important to prevent mold.
  • That said, if you can’t get enough juice out of the cabbage to cover it, you can make a bit of extra brine by mixing 200 grams of warm water with 5 grams of salt. Allow the salt to dissolve, then let the brine cool to room temperature. 
  • Experiment with how thick you like your cabbage. Some like it thinly sliced on a mandoline while others like it closer to ¼- or ½-inch pieces. Thick slices will be much crunchier after fermenting while thin slices will be more tender.
  • If you use the food processor to cut your cabbage, be sure to put it on the slice function, not the shred function. This will give you better pieces for sauerkraut while shredding will give you tiny pieces better suited for coleslaw.
  • Follow the recipe closely. The most important things to have a successful ferment are using the correct amount of salt and ensuring the cabbage is fully submerged under the brine.

Optional Add-Ins

This red sauerkraut recipe is delicious as written, with just cabbage and salt. However, if you want to get creative with it and try different flavors, there are several things you can add to your ‘kraut to give it an extra pop of flavor.

  • Juniper berries
  • Caraway seeds
  • Bay leaves (these will also help it stay crunchier!)
  • Garlic
  • Dill
  • Coriander seeds
  • Other veggies, such as carrots, beets, or celery.

It’s important to note that if you add other vegetables, you will need to include them in the weight on which you base the amount of salt. If you were to add carrots to this recipe, you would want to substitute part of the weight of the cabbage with the same weight of carrots or increase the amount of salt to maintain a 2.5% salt concentration.

a jar of sauerkraut with measuring spoons, a cabbage head, and a chunk of cabbage

Finding Mold in Your Sauerkraut

Finding mold in your jar of sauerkraut is very rare if you follow the instructions properly. Using the correct amount of salt and the cabbage being fully submerged under the brine will prevent mold most if not all of the time. 

It does happen, however, and it’s important to know when it’s bad. You may notice a white frothy substance or a smooth, powdery white substance forming on top of your sauerkraut. This is probably kahm yeast and is totally harmless. 

If you notice a colored substance, hairy texture, or a funky smell (more funky than regular sauerkraut), it’s best to discard the sauerkraut and try again. While this is discouraging, it happens sometimes and it’s better to be safe than sick.

Uses

There are so many delicious uses for sauerkraut! I try to add it to a meal every day to ensure I’m getting a dose of gut-healing bacteria each day. Here are some of my favorite uses for homemade fermented red cabbage:

  • Top hot dogs. This elevates the flavor of a hot dog so much! The tangy flavor and crunchy texture go perfectly with dogs and mustard.
  • Use it as a simple side dish. Serve sauerkraut plain with any main dish. It’s the easiest veggie side dish to have on hand and it’s great for you.
  • Serve with eggs. It sounds weird, but sauerkraut and eggs are delicious together. Plus, you start your morning right with a nutritious breakfast!
  • Make a Ruben. This is one of my all-time favorite sandwiches and they are so much better with homemade ‘kraut. Be sure to pile it high with the sauerkraut; don’t be stingy with it.
Yield: About 1 quart

Purple Fermented Cabbage (Sauerkraut)

A bowl of purple sauerkraut and a wooden fork

This simple fermented red cabbage is tangy, versatile, and great for your gut health. Preserve your cabbage and have delicious purple sauerkraut for hot dogs, sandwiches, and sides with just a few simple steps.

Cook Time 30 minutes
Additional Time 28 days
Total Time 28 days 30 minutes

Ingredients

  • 800 grams red cabbage, shredded
  • 20 grams salt*
  • Clean jar, quart-sized and wide mouth
  • Fermentation weight or spring
  • Fermentation lid

Instructions

  1. Remove the outer leaves of the cabbage head and slice it. You can slice it by hand with a sharp knife and cutting board or run it through a food processor with the slicing disk. How thick to slice it depends on your personal preference, but I usually aim for ⅛ -¼ of an inch.
  2. Put your shredded cabbage in a large bowl and add the salt. Using clean hands, massage the cabbage for about 5 minutes until it is tender and juicy and the salt is dissolved. Use a sauerkraut pounder or a wooden spoon to make this task easier. 
  3. Allow the cabbage to sit for 30-60 minutes to release more juice.
  4. Continue to massage the cabbage for another 5-10 minutes.
  5. Transfer the cabbage and its brine into a wide mouth mason jar. Scrape down every piece of cabbage so they are covered in the brine, then lay a whole cabbage leaf over the top to secure everything. 
  6. Place a fermentation weight or spring onto the cabbage, pressing down so the brine completely covers the cabbage. This will help to prevent mold.
  7. Secure a fermentation lid onto the jar and place it in a dark place out of direct sunlight. Allow the cabbage to ferment for 21-28 days.
  8. After 3 weeks, give the sauerkraut a taste test. If you like the flavor, transfer it to the fridge. If you want it to taste tangier, allow it to ferment for another week or so.

Notes

If you do not have enough liquid to cover the cabbage, you can make a brine with 5 grams of salt dissolved in 200 grams of dechlorinated water.

For best results, choose a high-quality salt with minerals. Redmonds real salt, pink Himalayan, or pickling salt are ideal.

homemade purple sauerkraut in a white bowl with a fork
Refreshing Blueberry Gin Cocktail: Simple Gin Fizz Recipe

Refreshing Blueberry Gin Cocktail: Simple Gin Fizz Recipe

This blueberry gin cocktail is fruity, sweet, and refreshing. Perfect for wow-worthy hosting or a casual happy hour, you’ll love whipping this cocktail up throughout the summer and beyond!


One of my favorite parts of summer is the beverages. From iced tea to smoothies to cocktails, there is always something delicious and refreshing to cool down with. This blueberry gin cocktail is one of my go-tos for summer because it’s beautiful, well-balanced, and ultra-refreshing!

Why You’ll Love It

Refreshing: Perfect for the summer months, this icy-cold, fruity cocktail is ideal for dinner parties, special occasions, or a casual happy hour. You’ll find yourself craving it on a hot day!

Easy: This blueberry gin fizz comes together so quickly and doesn’t require special knowledge or equipment.

Delicious: This cocktail is the perfect drink if you like lightly sweet beverages, but it can also be made extra sweet as desired! With the natural sweetness of the blueberries and the tartness of the lime juice, this drink is perfectly balanced.

looking down on two blueberry gin cocktails

Ingredients

  • Blueberries: You can use fresh blueberries or frozen.
  • Sugar: This is how we will lightly sweeten the blueberry syrup. You can use maple syrup, honey, or any other sweetener if you like.
  • Gin: Any of your favorite gin brands. Infused or regular gin; any kind of gin works.
  • Triple sec: This popular citrus liqueur gives the cocktail a lot more flavor. Feel free to use a different type of citrus liqueur.
  • Lime juice: This will add a bit of tartness to this sweet cocktail. Always use fresh lime juice if possible, not bottled. You can also try fresh lemon juice.
  • Garnishes: I like to make my cocktails pretty with a sprig of mint, a lime wedge, or edible flowers.

This post contains affiliate links. If you make a purchase through the links, I will earn a small commission that helps me continue to provide gardening content. As an Amazon Associate, I earn from qualifying purchases. Read my full disclosure here.

How to Make Blueberry Syrup 

Making your own blueberry syrup brings this cocktail to a new level! The blueberry flavor is fresh and naturally sweet. Here’s how to make a batch of blueberry syrup.

  1. Combine the blueberries, water, and sugar in a small saucepan and bring to a light boil over high heat. Mash the berries with a fork or potato masher to release the blueberry juices. Stir to ensure the sugar dissolves.
  2. Reduce to medium heat and simmer for 5-7 minutes.
  3. Remove from the heat and pour the syrup through a fine mesh strainer. Use a spoon to press out as much juice as possible while straining out the blueberry skins.
  4. Allow the syrup to cool to room temperature before using it in a cocktail.
a pot of freshly made blueberry syrup
Straining blueberry syrup through a fine mesh strainer into a jar

​Uses for Leftover Blueberry Syrup

If you find yourself with too much blueberry syrup, there are so many other delicious uses for it! I like to make a double batch and use it throughout the week.

  • Use leftover syrup in a delicious blueberry matcha latte
  • Drizzle over vanilla ice cream
  • Stir into plain yogurt to make a sweet and creamy blueberry yogurt
  • Make a blueberry mocktail with club soda, blueberry simple syrup, ice, and fresh mint leaves.

Variations

Give your blueberry gin cocktail a floral flavor by adding lavender. You can add dried lavender to the blueberry syrup or use half blueberry syrup and half lavender simple syrup.

Try this gin fizz with different fruits. You can follow the same method with any other type of berry! I love strawberry cocktails especially, like this strawberry mojito.

Add herbs to the cocktail. You can try a thyme sprig, fresh basil leaves, or fresh mint. Simmer them into the blueberry syrup to extract as much flavor as possible.

Yield: 2 cocktails

Blueberry Gin Fizz

a glass of blueberry gin fizz with blueberries and a second cocktail in the background
This blueberry gin cocktail is fruity, sweet, and refreshing. Perfect for wow-worthy hosting or a casual happy hour, you’ll love whipping this cocktail up throughout the summer and beyond!
Prep Time 10 minutes
Cook Time 5 minutes
Total Time 5 minutes

Ingredients

For the Syrup

  • ½ cup blueberries, fresh or frozen
  • ¼ cup water
  • 2 tablespoons sugar

For the Cocktails

  • 1 ½ ounce homemade blueberry syrup, or more to taste
  • 1 ounce fresh lime juice
  • 3 ounces gin
  • 1 ounce triple sec
  • Ice
  • Seltzer water, about 12 ounces
  • Garnishes of choice*

Instructions

  1. Combine blueberries, sugar, and water in a small saucepan and bring to a boil. Reduce to medium-low heat and simmer for 5-7 minutes.
  2. While the blueberries are simmering, use a fork to crush them thoroughly and release all of the juices.
  3. Remove from heat and allow to cool to room temperature.
  4. Pour blueberry syrup through a fine mesh strainer, pressing down with a spoon to press juices through the strainer.
  5. To make your cocktail, begin by combining homemade blueberry syrup, lime juice, gin, and triple sec in a cocktail shaker. Add a handful of ice cubes and shake vigorously for about a minute. 
  6. Pour the mixture evenly between two 16-ounce cocktail glasses, straining out the ice.
  7. Add fresh ice to each glass, then fill to the top with seltzer water.
  8. Garnish with fresh blueberries, a sprig of mint, and/or edible flowers.

Notes

*Use fresh blueberries, fresh mint, a wedge of lime, or edible flowers for a garnish

In a pinch, feel free to use hot blueberry syrup, but your drink will become slightly watered down.

a blueberry gin cocktail with blueberries, edible flowers, and another cocktail in the background