
Simple DIY Simmer Pot Gift Idea & Free Printable Labels

These homemade simmer pot kits are easy to make, beautiful, useful, and such a thoughtful gift. The ingredients and decorations on each jar can be catered to the gift recipient, making each one personal.
It’s the time of year to start thinking about Christmas gifts. I always like to incorporate something homemade into my gifts to share something unique and thoughtful.
If you are looking for a great homemade gift to give friends, family, coworkers, and teachers, these simple DIY simmer pot gifts are perfect.
Simmer Pot Kit for a Simple Holiday Gift
These homemade simmer pot kits are the perfect small, simple gift for the holiday season. Anyone with a stove can use and appreciate one, but they are customizable to give each gift a personal touch.
I love these simmer pot kits for teacher gifts, coworker gifts, stocking stuffers, and hostess gifts. They are useful, made with natural ingredients, and consumable so they do not contribute to clutter in the home.
What Are Simmer Pots?
A simmer pot is a way to make your home smell nice by simmering fragrant fruits, herbs, florals, spices, and more in a pot of water. Not only does this make the air smell nice, but it also creates humidity in your home, which can be helpful for skin and respiratory health in the dry, cold months.
The aromatic ingredients can vary based on availability and preference, which offers a fun opportunity to experiment with different blends. Simmer pots are usually made with fresh ingredients, sometimes scraps such as citrus peels and used pine decorations. These fresh ingredients, however, can be dried and packaged into kits for a quick and easy simmer pot.
By using dried fruit and herbs, these simmer pot kits are shelf-stable, allowing your loved ones to use them at their convenience. They are also zero-waste; the ingredients, once spent, can be composted and the jar can be reused.
This post contains affiliate links. If you make a purchase through the links, I will earn a small commission at no cost to you. As an Amazon Associate, I earn from qualifying purchases. Read my full disclosure here.
How to Make a Simmer Pot Gift
Making a simmer pot kit can be as easy or as complex as you’d like! To make one, you’ll need a jar, ingredients to fill the jar, and some sort of decoration for the kit, such as a ribbon or cloth jar topper. Some of the ingredients will already be shelf-stable while others will need to be dried.
You can jump ahead to how to dry fruit for the kits or ingredient ideas for them.
Herbs and Spices to Use in a Simmer Pot
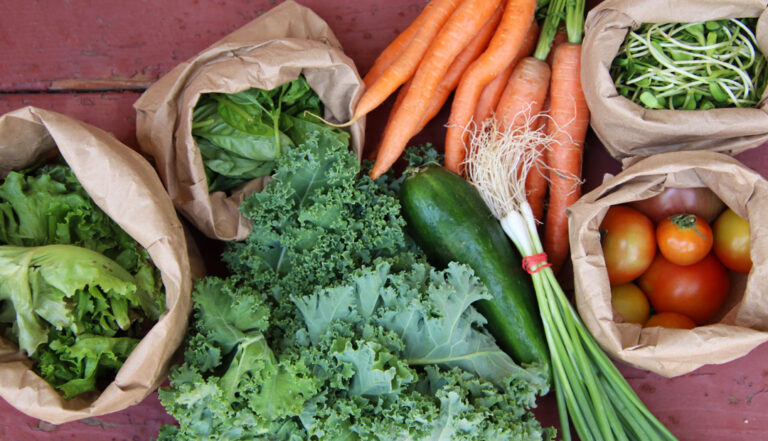
Always choose dry ingredients so your simmer pot kit doesn’t mold. Many health food stores offer herbs and spices in their bulk bins that are more affordable than small jars at the grocery store, plus you can purchase the exact amount you need.
I like to use whole leaves or sprigs instead of ground or crushed herbs when I can because they are more visually appealing. If you have homegrown herbs that have been dried, this is a great way to use them!
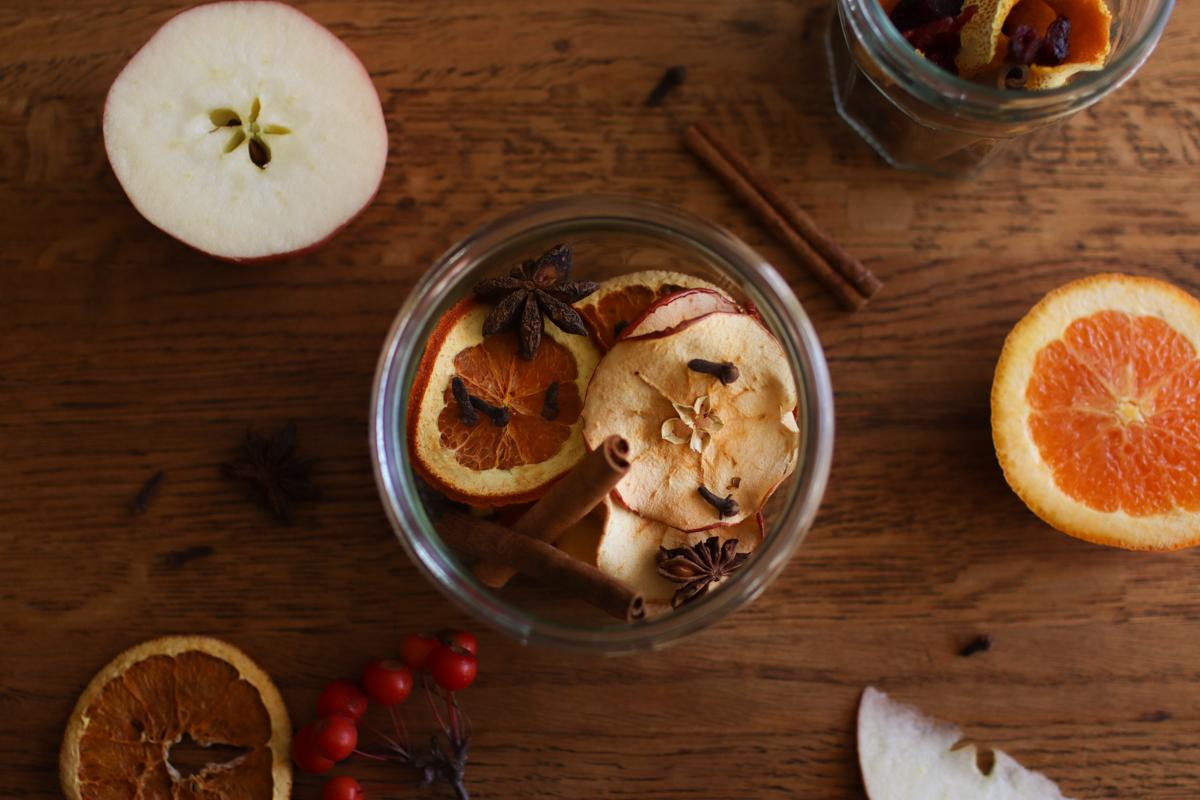
How to Dehydrate Fruit for a Simmer Pot
It’s very easy to dry apples and citrus fruit without a dehydrator by baking them in an oven at a very low temperature.
- Wash your fruits and remove the produce stickers.
- Slice the fruit horizontally so the core is going through the center of each slice. Aim for thin slices, about ⅛ – ¼ inch (about 3 – 6 millimeters) thickness, and try to keep the knife straight so the slices are even. Uneven cuts can result in half the slice being burnt while the other half is not dry. A mandoline is very useful for this.
- Pat fruit gently with a tea towel to remove as much of the juice as possible.
- Lay slices in a single layer on a sheet pan that has been lined with parchment paper or a silicone baking mat. If you have an oven-safe wire rack, you can set that on the baking tray and place the fruit on the rack. The air circulation will help them dry out faster and more evenly.
- Bake in a preheated oven at 200°F or below. Prop the door open with a wooden spoon so the excess moisture can escape easily.
- After two hours have passed, start checking the fruit every 30 minutes. Once it is completely dry, remove it from the oven and let it cool. Some slices will dry faster than others, so remove them as they are dry.
- Once cooled, ensure all of the moisture is out of the fruit by checking for parts that are not hard or crunchy. If any of it is soft or pliable, bake them longer.
Notes
- If your fruit is browning but not getting dry, that likely means your oven is too hot or your slices are too thick. Try turning the oven down to its lowest setting.
- You may have some stubborn slices that won’t dry, particularly with citrus fruits. Try turning off the oven and letting them air dry overnight. I’ve found that if the slices are close to dry in the oven, air drying works well to finish dehydrating them.
- You can dry fresh cranberries in a food dehydrator, but I recommend purchasing dried cranberries for the simmer pot kit rather than drying them in the oven.
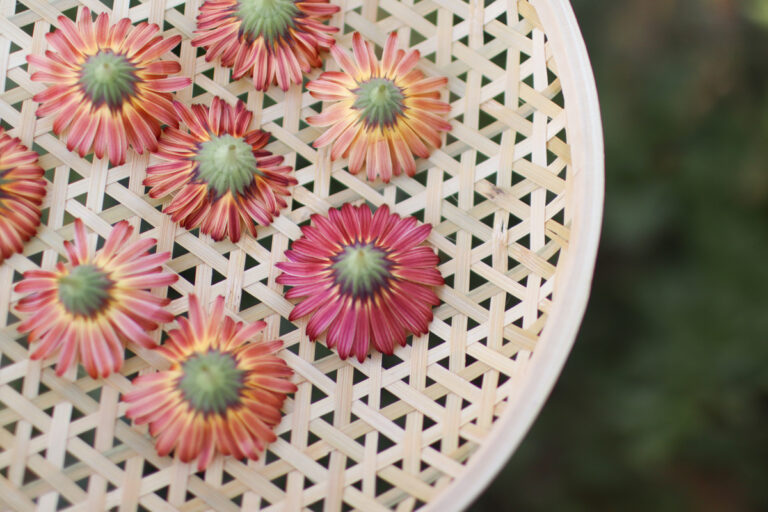
- Dried orange slices also make a beautiful natural Christmas decoration!
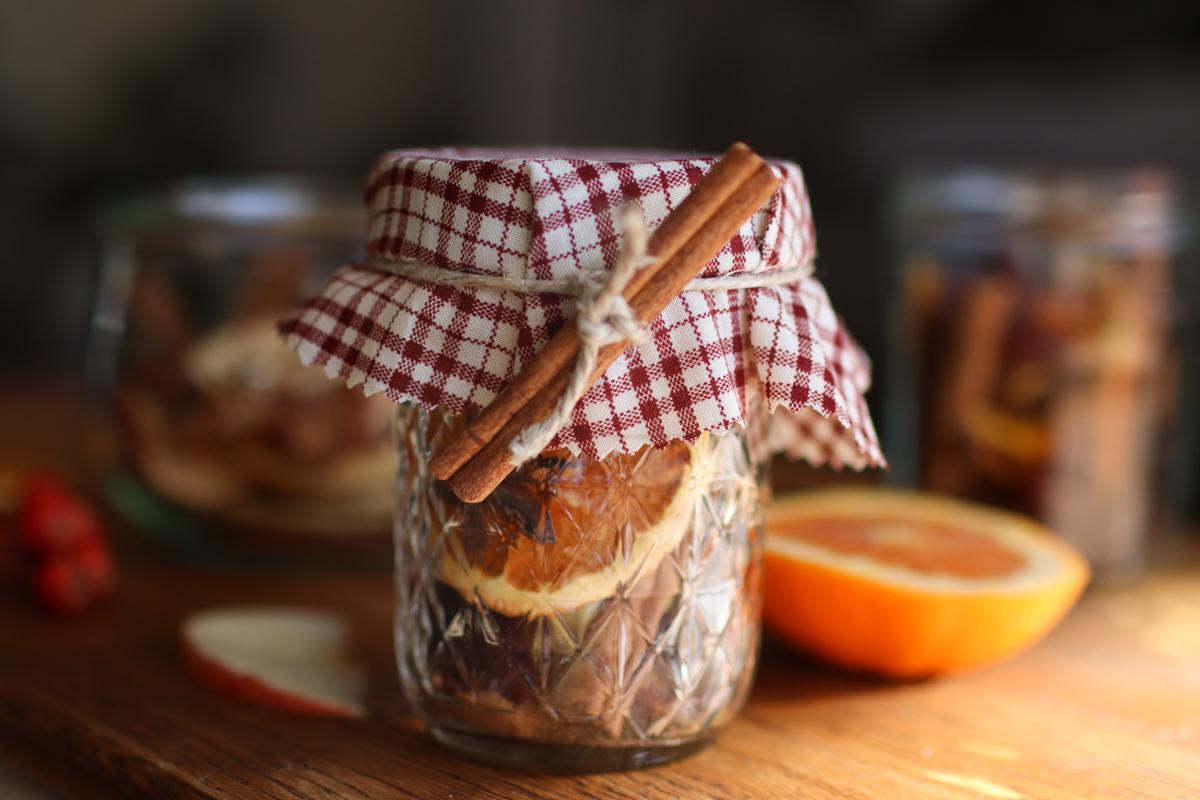
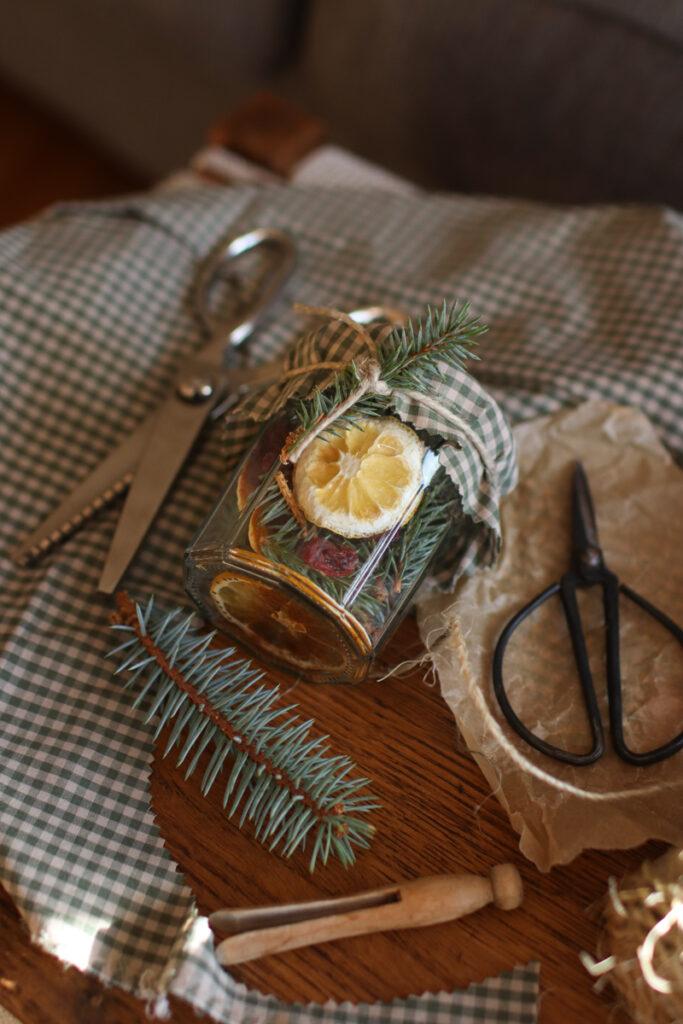
How to Package a Simmer Pot Kit
You can get as creative as you want when packaging your simmer pot kit. Aim for a jar that’s between 8 and 16 ounces so you are providing enough aromatics to make an effective simmer pot. You can use a mason jar with a metal band, clamp-lid jar, or even reuse an old pasta sauce jar.
Gather colorful yarn, jute twine or festive ribbon, pinecones, pine sprigs, vintage clothespins, fabric, dried oranges, and any other bits or bobs you have, and start decorating.
Get Free Printable Labels for Your Simmer Pot Gift
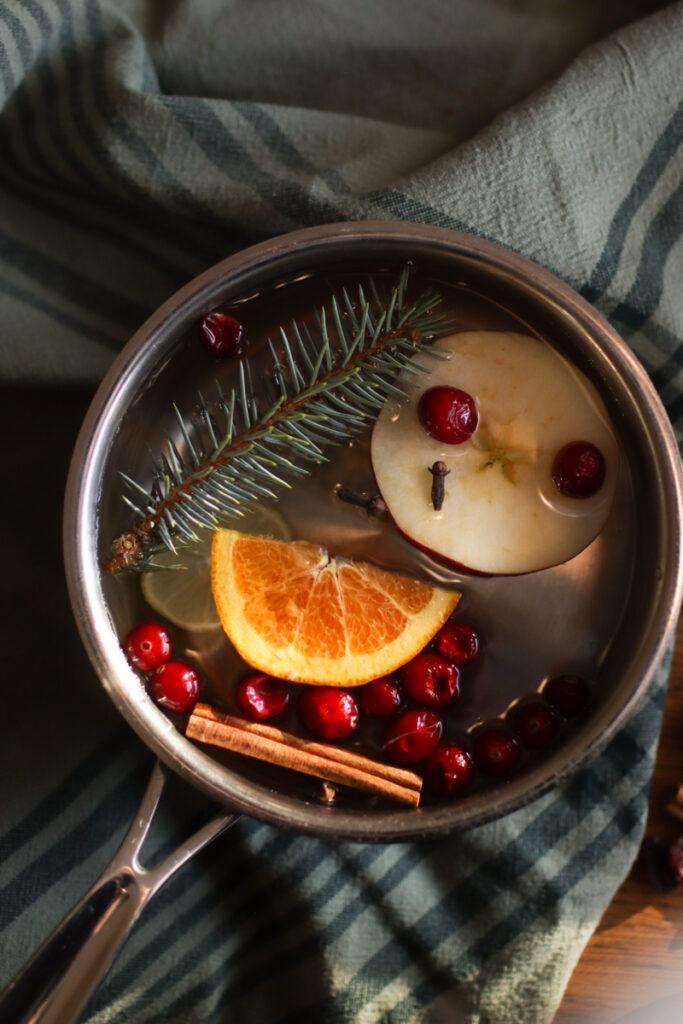
How to Use a Stove Top Simmer Pot Kit
Place the contents of a simmer pot kit in a small pot with at least enough water to cover the ingredients. Bring to a low simmer over low heat and allow it to simmer for up to six hours. Check on the simmer pot periodically to ensure the water level doesn’t get too low. Add more water as needed.
Simmer pots can also be done in a slow cooker. Turn the cooker on high to get it simmering, then turn it down as needed. Continue to check on the water level throughout the day.

Ingredient Combinations to Try
Here are a few ideas to get you started, but feel free to get creative and try lots of different combinations!
Apple Cider
- Apple slices
- Orange slices
- Whole cloves
- Cinnamon sticks
Snowy Day
- Orange
- Peppermint
- Rosemary
Christmas Tree
- Cuttings from pine trees
- Lemons
- Cranberries
Knit Sweater
- Lavender
- Oranges
- Rose
Other Simmer Pot Ingredients to Experiment With
Any dried fruits, herbs, spices, flowers, or evergreen sprigs you can find will be great in a simmer pot! Here are a few you may want to add to a blend:
- Chamomile (learn how to dry chamomile)
- Bay leaves (learn how to dry bay leaves)
- Cardamom
- Allspice
- Nutmeg
- Ginger
- Bergamot
- Star anise
- Lemon verbena
- Basil
- Thyme
- Oregano
- Peppercorns
- Geraniums
- Hibiscus
- Eucalyptus leaves
- Cuttings of cedar branches
- Pomegranate seeds or peels
- Juniper berries or branches
- Pear slices
- Grapefruit slices
- Lime slices
I hope you have fun making these lovely homemade gifts this holiday season!

Simmer Pot Gift
Equipment
- Scissors
- Hole punch
Ingredients
- 1 10-ounce jar
- 1 cup of dried herbs, spices, and fruit*
- Ribbon twine, fabric jar toppers, or other decorations
- Printable gift tag
Instructions
- Dry herbs and fruit as needed so that everything is properly dehydrated.
- Pack the aromatic ingredients into the jar, arranging them so they are pointed out.
- Place the lid on the jar and decorate it as you desire.
- Tie the printable tag onto the jar and give it to friends, family, teachers, and coworkers.


I love making these every year for myself and others. There are truly endless possibilities for the ingredients and jar decorations!