How to Dry Sage in the Oven (+3 Other Easy Methods)

Learn how to dry sage in the oven following just a few simple steps! Drying sage is a fantastic way to preserve this flavorful herb for later use.
Culinary sage is a popular herb in the kitchen with its earthy, savory flavors. It is also a common perennial herb to include in an herb garden! This pale green leaf packs a flavorful punch and is a versatile herb to add to your meals.
If you are growing your own sage, you may feel the rush to harvest and preserve it before the cold weather comes. Having lots of sage to preserve is no problem, however, because drying sage is an easy and effective way to make it last months!
Need help drying sage? That’s no problem either – I’ll take you through what you need to know to dry sage in the oven, microwave, dehydrator, or air dry.
This post contains affiliate links. If you make a purchase through the links, I will earn a small commission at no cost to you. As an Amazon Associate, I earn from qualifying purchases. Read my full disclosure here.
How to Harvest Sage
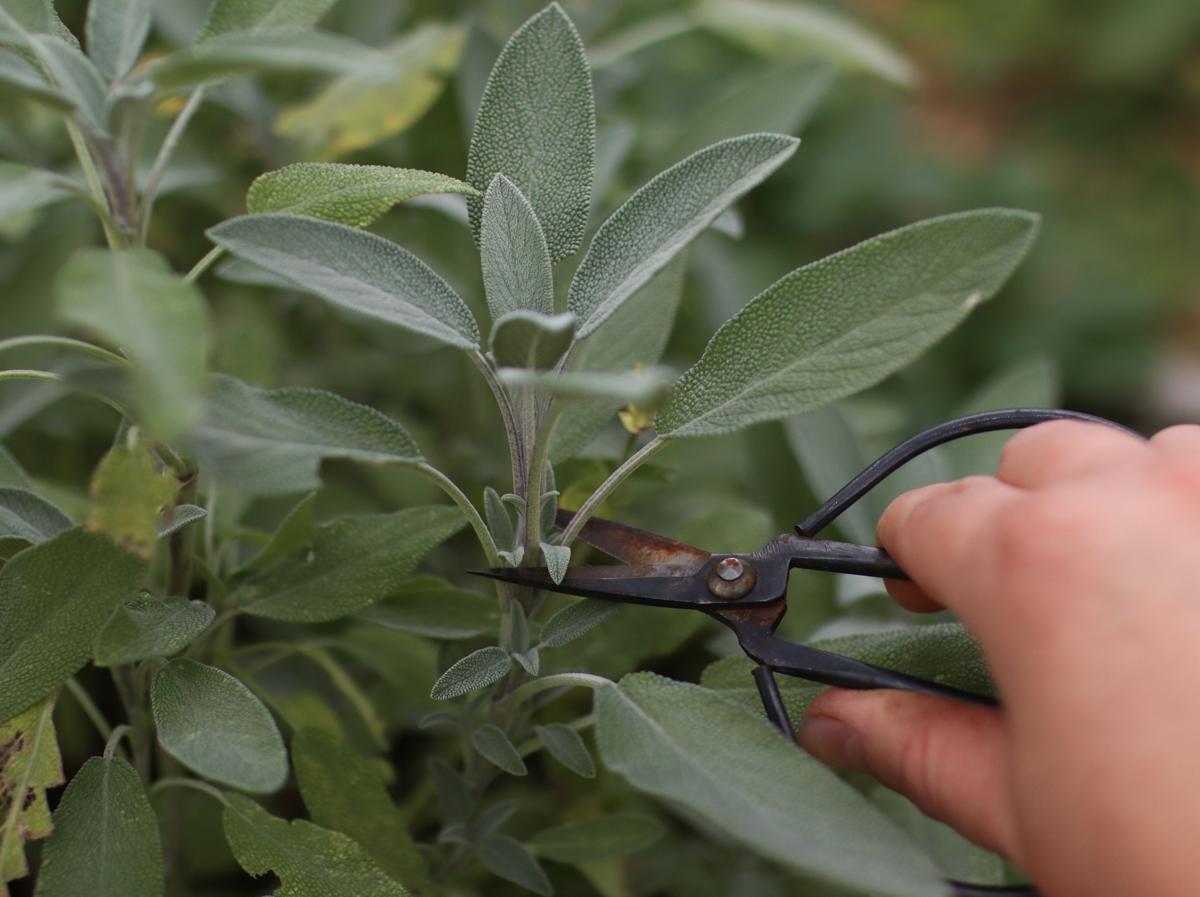
Before you dry sage, you will need to harvest it from your herb garden. Sage plants are perennial herbs, which means they will come back each year and go dormant in the winter. Avoid harvesting sage from a sage plant in its first year of life so it has time to become well-established before harvest.
You can harvest sage anytime throughout the summer and fall, but I recommend waiting for a big harvest towards the end of the season. You can take just the amount you need for a dish throughout the summer and preserve a larger quantity in the fall.
To harvest sage, pick or cut off single leaves or longer branches in the morning hours. Be sure not to take too much off of the plant as you could kill it. I recommend removing no more than ⅓ of the leaves on the plant at one time.
Before drying, you can give your sage leaves a quick rinse under cold water and dry them in a salad spinner or with a clean towel.
How to Dry Sage in the Oven
Using the oven is the best way to dry sage because it is quick and easy. While all of the simple methods below work well and have their benefits, I think the oven-drying method produces the best flavor and requires the least time or know-how.
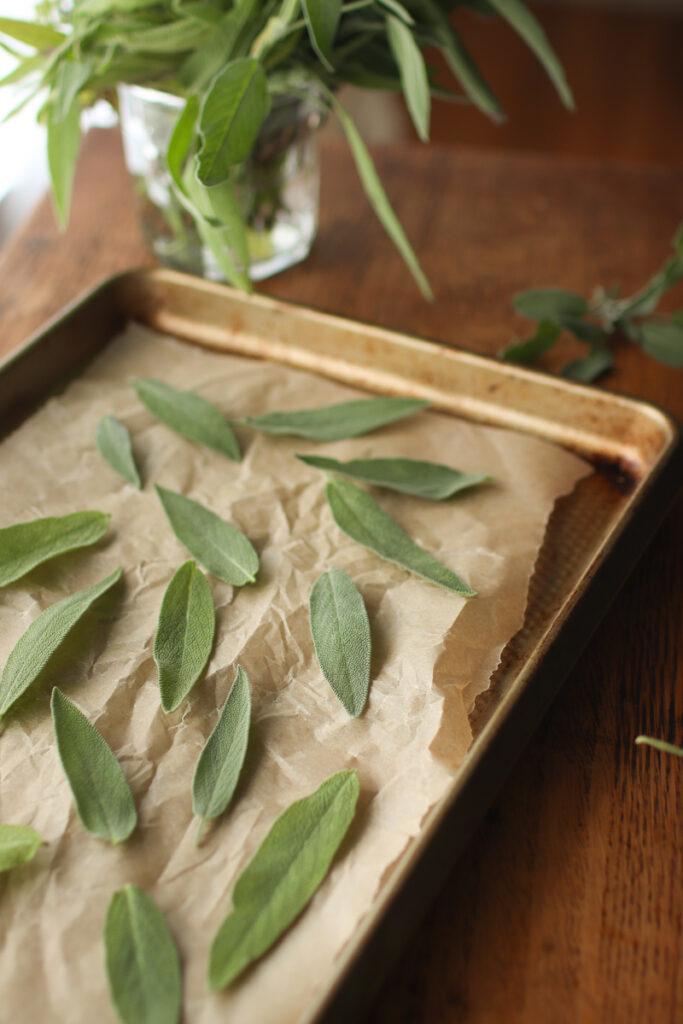
Once your sage has been washed and dried, here’s how to dry it using your oven:
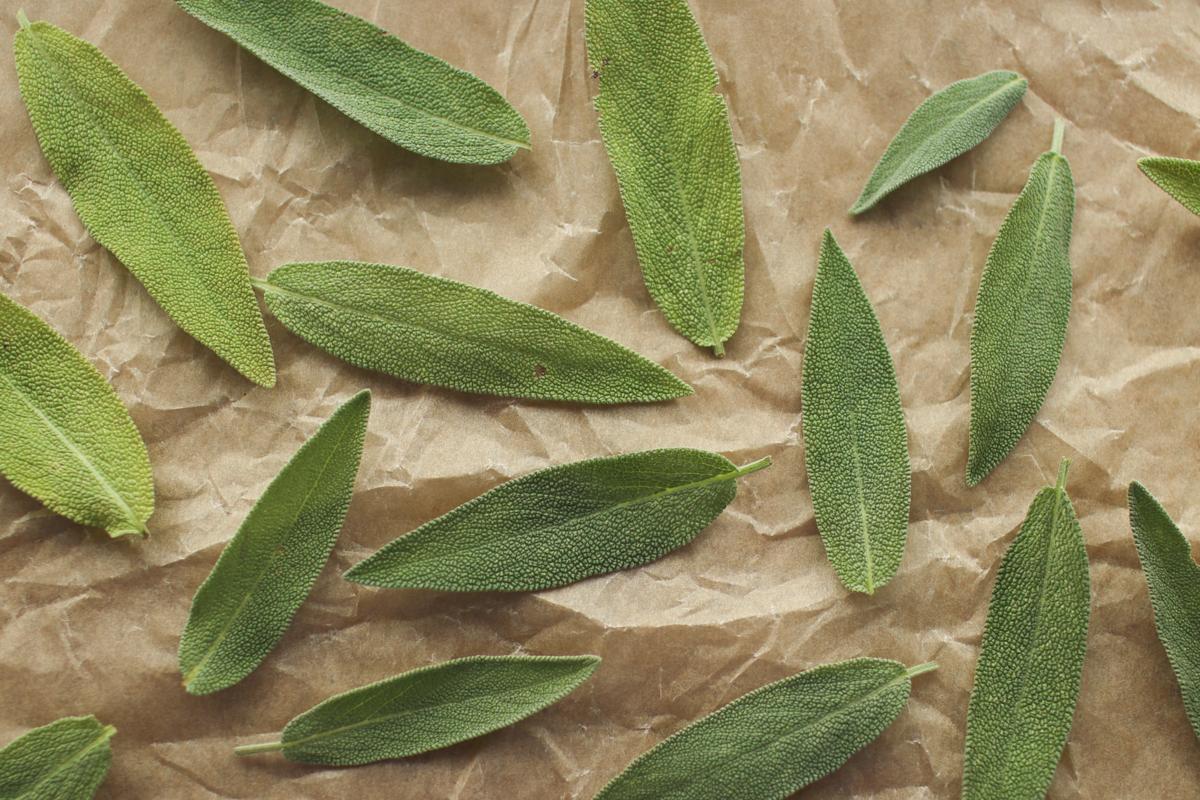
- Arrange the sage in a single layer on a cookie sheet lined with parchment paper. Alternatively, you can place an oven-safe cooling rack onto a baking sheet and arrange the sage leaves onto the rack. This will allow for greater airflow and more even drying.
- Set your oven to the lowest temperature and pop your tray of sage leaves in. Prop the oven door open with a wooden spoon to release excess moisture and encourage drying.
- After an hour, check your sage leaves. They should be completely dry and crunchy but not brown. If they are still pliable or moist, leave them in longer. Check on the sage leaves every 15 minutes after that to avoid burning them.
- Remove the dried sage leaves from the oven and allow them to cool completely before storing them.
How to Air Dry Sage
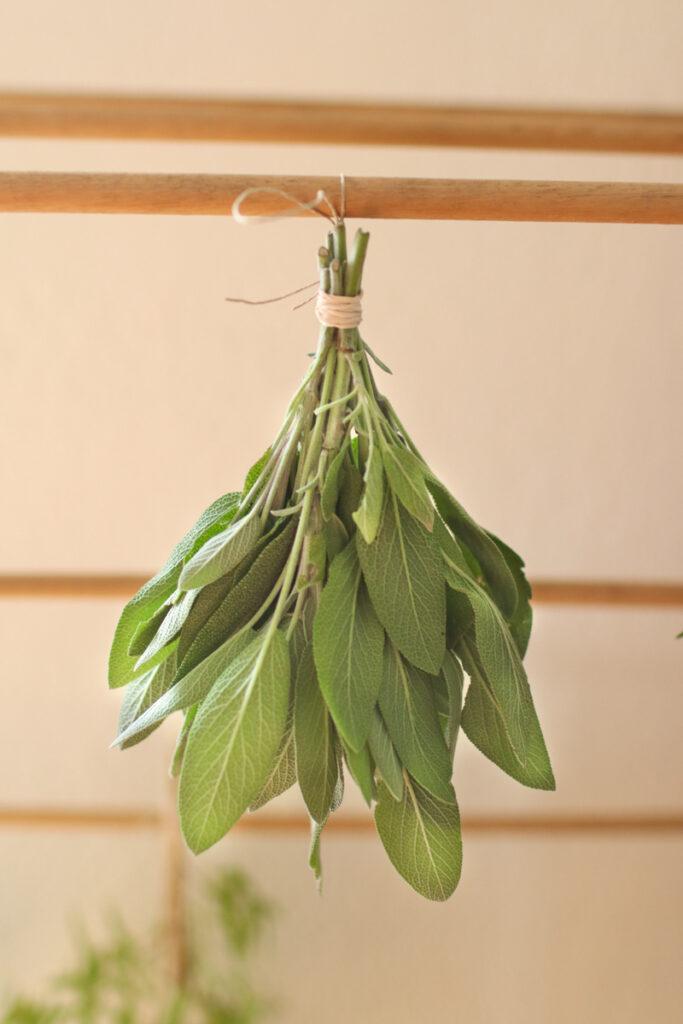
Air drying sage is the easiest, most hands-off method of drying sage. Its downside is that it takes some time and will take up space in your home while it’s drying. Still, air drying doesn’t require any special equipment and it is simple to set up. Here’s how to do it:
- Harvest sage in 4-6 inch stems rather than individual leaves. Bundle them with some string or a rubber band. I recommend keeping each bundle to 3-5 branches to allow for proper airflow.
- Hang the bundles off of an herb-drying rack, shelf, or rod in a dry place out of direct sunlight.
- The drying time will depend on the temperature and humidity of your house but check them regularly after a week. Allow them to dry fully, but don’t let the leaves hang too long because they will gather dust.
How to Dry Sage in a Food Dehydrator
Food dehydrators take a financial investment and some storage space, but they are a great investment for gardeners who preserve a lot of food. If you have a dehydrator, you may want to save your oven space and dry your sage leaves in the dehydrator instead. Here’s how to do it:
- Set your dehydrator to a low setting, around 95-115°F.
- Arrange the fresh leaves in a single layer on the dehydrator trays and put them in the dehydrator.
- Allow the sage to dry for two hours, then start checking it regularly. Be careful not to burn the leaves, but still ensure all of the moisture is gone from the sage leaves before packing them away.
- Allow the sage to cool completely before storing.
Drying Sage in a Microwave
Microwave drying is my least favorite method of drying herbs, but it can be effective in a pinch. Drying sage in a microwave is certainly the fastest method, and it can be done without a full kitchen or special equipment. Here’s how to dry sage in a microwave:
- Arrange leaves on a microwave-safe plate lined with a paper towel.
- Set your microwave on low power, then microwave your sage for 30 seconds. Check the leaves before adding more time.
- Continue microwaving the sage in 30-second intervals until it is completely dry.
What to Do Next
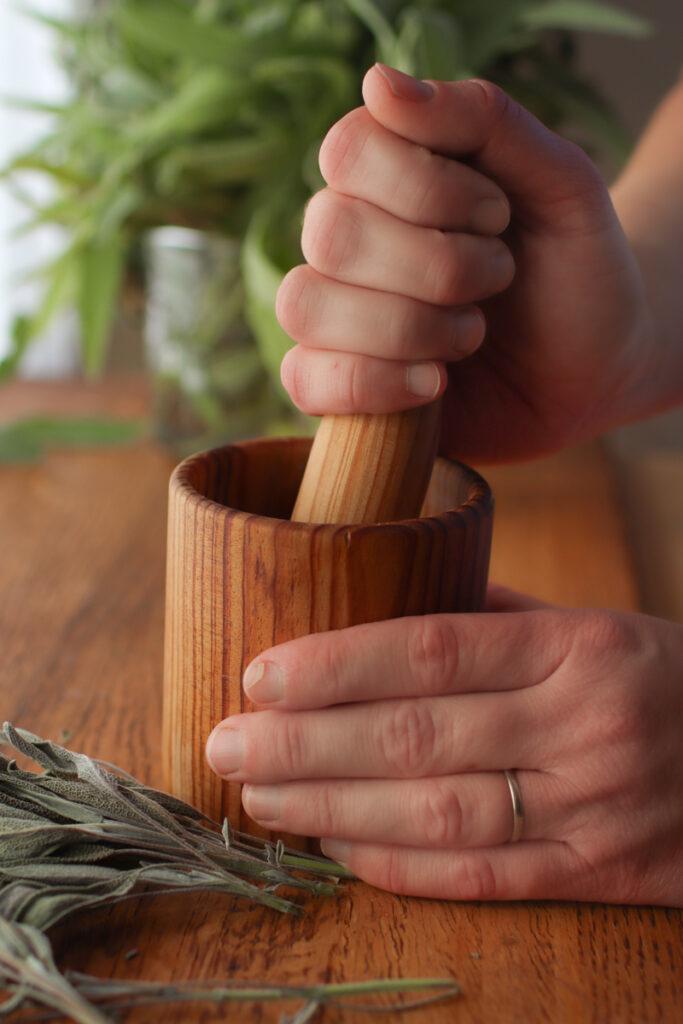
Once your sage leaves are dried, there are a few different ways you can process them. If you don’t want to process them at all, you can simply remove the leaves from their stems (if you air-dried them in bundles) and store the dried leaves whole.
You can also take the leaves and crumble them with your hands into small pieces. This produces something similar to “rubbed sage” that you can purchase at the grocery store. You may crush them as much as you like before storing.
Lastly, you can make ground sage by running the leaves through a food processor, blender, or mortar and pestle. This creates a fine powder for cooking.
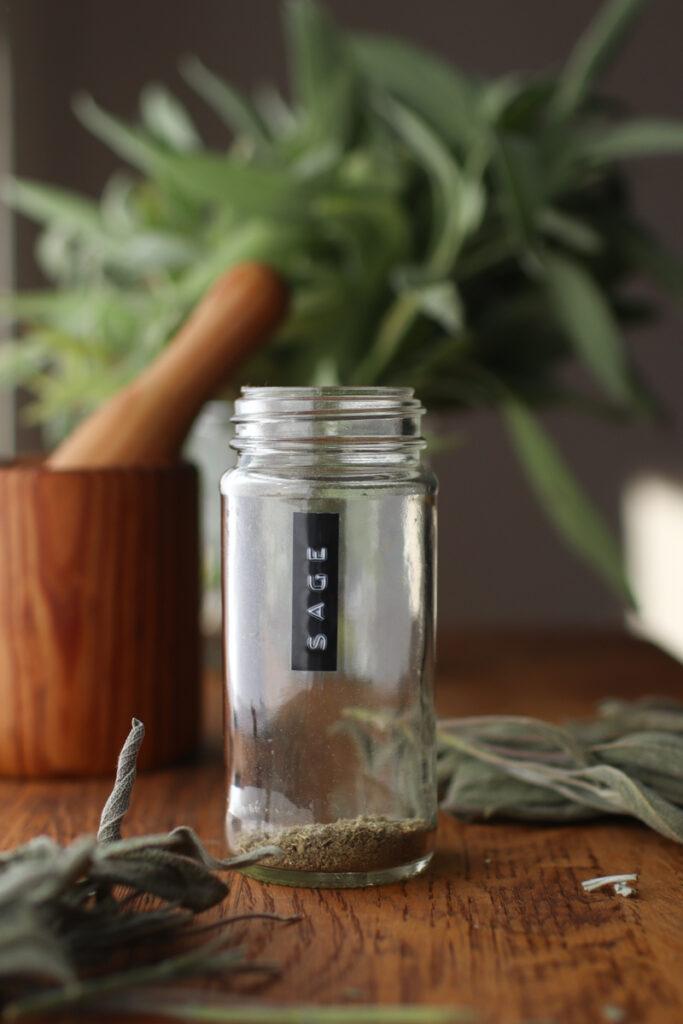
How to Store Dried Sage
Always be sure that your sage is fully dry before storing it. Any leftover moisture will create mold and ruin the whole batch of sage that you lovingly grew, harvested, and preserved.
Pack the dried leaves into an airtight container, such as glass jars or a plastic bag. Label them with the contents and date, and keep them in your spice cabinet for use in a variety of dishes.
Uses for Dried Sage
Sage is such a flavorful, delicious herb! There are so many uses for it, you’ll be happy you preserved so much for the winter months.
- Make tea: Sage makes a unique and delicious herbal tea!
- Use in pasta dishes: Sage tastes so great in fall-themed pasta dishes such as butternut squash ravioli or pumpkin gnocchi.
- Add to soups: Just like pasta, sage is a great fall herb. Add it to butternut squash soup, autumn harvest soup, or creamy mushroom soup.
- Add to cocktails: It’s more common to use fresh sage, but if it’s not in season then dried sage is delicious too! I like to use it in a flavored simple syrup to add an earthy pop to my cocktails.
- Make sage butter: You’ll love slathering homemade sage butter on rolls, fresh bread, steak, and more.
- Make potpourri: Sage in sachets or potpourri is fragrant and soothing.
- Add to skincare: You can infuse sage into oil to make balms and lotions.
Frequently Asked Questions
How do I use dried sage instead of fresh sage?
The general rule of thumb is to use dried herbs to fresh herbs in a 1:3 ratio. This means that if a recipe calls for three tablespoons of fresh sage, you would use one tablespoon of dried sage. If in doubt, it’s always better to start with even less and add more to taste. Home-dried herbs tend to be more flavorful than store-bought ones because they are fresher.
How long is dried sage good for?
Dried herbs are edible for a long time (years). However, their flavor does diminish over time, so it’s ideal to make just enough for the year and harvest more next year. The recommended shelf life for dried sage is around 12 months.
Can I freeze sage instead of drying it?
Yes, you definitely can freeze sage to preserve it rather than dry it. Learn exactly how to freeze sage in my full tutorial!
Get More Simple Herb Drying Tutorials
Keep the preservation going with more easy how-to guides for drying herbs!
How to Dry Sage 3 Ways
Equipment
- Salad spinner
Ingredients
- Fresh Sage
One of the following:
- String and rubber bands
- Baking tray and parchment paper
- Food dehydrator
- Plate and paper towel
Instructions
Oven Drying
- Arrange the sage in a single layer on a cookie sheet lined with parchment paper. Alternatively, you can place an oven-safe cooling rack onto a baking sheet and arrange the sage leaves onto the rack. This will allow for greater airflow and more even drying.
- Set your oven to the lowest temperature and pop your tray of sage leaves in. Prop the oven door open with a wooden spoon to release excess moisture and encourage drying.
- After an hour, check your sage leaves. They should be completely dry and crunchy but not brown. If they are still pliable or moist, leave them in longer. Check on the sage leaves every 15 minutes after that to avoid burning them.
- Remove the dried sage leaves from the oven and allow them to cool completely before storing them.
Air Drying
- Harvest sage in 4-6 inch stems rather than individual leaves. Bundle them with some string or a rubber band. I recommend keeping each bundle to 3-5 branches to allow for proper airflow.
- Hang the bundles off of an herb-drying rack, shelf, or rod in a dry place out of direct sunlight.
- The drying time will depend on the temperature and humidity of your house but check them regularly after a week. Allow them to dry fully, but don’t let the leaves hang too long because they will gather dust.
Food Dehydrator
- Set your dehydrator to a low setting, around 95-115°F.
- Arrange the fresh leaves in a single layer on the dehydrator trays and put them in the dehydrator.
- Allow the sage to dry for two hours, then start checking it regularly. Be careful not to burn the leaves, but still ensure all of the moisture is gone from the sage leaves before packing them away.
- Allow the sage to cool completely before storing.
Microwave
- Arrange leaves on a microwave-safe plate lined with a paper towel.
- Set your microwave on low power, then microwave your sage for 30 seconds. Check the leaves before adding more time.
- Continue microwaving the sage in 30-second intervals until it is completely dry.