Growing Live Mulch: A Garden Experiment
Every year I like to try new things in the garden. Some of them stick, some are altered the following year, and some simply don’t work out. No matter how the experiment goes, I always learn something new about gardening. This year, my biggest experiment is growing live mulch in my main garden bed. Follow along on the journey and hopefully you can learn from my mistakes and triumphs!
Why I Decided to Grow Live Mulch
In my pursuit of more sustainable gardening practices, I have learned a lot about growing cover crops. Basically, cover crops are grasses and other ground covers that are grown during the off season in gardening to enrich and protect your soil while also sequestering carbon. In cold climates such as mine, the seeds are sown in the fall once the garden is cleared and they are left until spring. When the time to garden comes around in spring, the cover crop is mowed and the roots are left to decompose, further enriching the soil. The type of crop matters, as different plants provide different nutrients to the soil and some are better suited for this purpose.
I will be growing winter rye this coming fall, but until then, I am looking at all of the bare soil that is sitting in my garden right now. Bare soil, in nature, means death and infertility. Bare soil in my garden leaves it open to erosion and can leave it dry and depleted.
I figured there must be something I can do for my soil health during this time of year, and that’s how I discovered live mulch.
This is an ongoing experiment, but I want to get the information out in case anyone wishes to experiment with me! I will keep this updated throughout the growing season and complete it in the fall.
What is live mulch?
Live mulch is the growing of low-to-the-ground cover crops in early spring that have the combined advantages of winter cover crops and traditional mulch. They grow during the spring and are left through summer; the gardener simply digs a small amount up to make room for their taller plants (tomatoes, peppers, corn, etc.).
Mulching crops is a common practice in gardening. Mulching prevents weeds, holds in moisture, and prevents erosion. This is commonly achieved by laying bark, grass clippings, leaves or straw around plants. This is not a bad option for gardeners at all, but live mulch has a few additional benefits that I am interested in.
Live mulch achieves all of the goals of traditional mulching, but it also:
- Fixes nitrogen or phosphorus in the soil (this depends on the type of plant sown)
- Loosens and aerates the soil with its roots
- Eventually enriches the soil as the plants decompose (cover crops are left in the garden, either turned in or simply cut back)
- Attracts beneficial insects
- Makes your garden lush and beautiful!
What can I use for live mulch?
There are a variety of crops that can be used for live mulch. Legumes such as fava beans and clover fix nitrogen to the soil while grasses are more effective at smothering weeds.
I chose crimson clover for my live mulch. This cover crop appealed to me because:
- As a legume, it fixes nitrogen in the soil
- It’s fast growing. I am a little bit behind and want to get my cover crop growing as quickly as possible.
- Crimson clover produces gorgeous flowers! I’m excited about these flowers because the bees love them, they are lovely cut flowers, and they are edible!
- The seeds were available at my local garden shop
- I predict that it will be easier to keep these from going to seed. With a grass, I would need to carefully mow or trim it before it goes to seed without hurting my vegetables. With crimson clover, I will simply keep the flowers cut, which will be easy to keep up with because they are stinking beautiful (and useful!).
If you are interested in other types of cover crops, the most common ones are: fava beans, buckwheat, peas, oats, alfalfa, red clover, wooly thyme, fescue, or hairy vetch. As I haven’t tried these personally, I can’t attest to their benefits or disadvantages.
The Method
In early Spring, before many of my crops have been sown, I leveled out my prepared garden bed and simply scattered the seeds. The seed packet suggested one seed every two inches, so I aimed for that density as I scattered. After lightly raking the seeds in, I watered every day until they developed into seedlings.
I only grew this live mulch where I will be planting larger plants like peppers, tomatoes and cucumbers. I have root veggies and some greens planted in other areas and I didn’t want to create too much competition for water and light in those areas. Because the crimson clover will have more shallow roots, I put it with deep rooted plants and I will dig up a circle to put the seedlings in when it’s time to plant other crops.

End-of-Season Update
What Went Well
- The planting method worked well. The seeds germinated at a satisfactory rate and the plants filled in well. I did not thin at all and there didn’t seem to be any issue with that.
- The flowers and plants were beautiful! The plants were a vibrant green and the bright pink flowers were in full bloom by early July. My garden looked very lush and filled in, which was a huge bonus for me. I greatly enjoyed having the crimson clover growing everywhere.
- The pollinators, particularly honeybees, loved the blooms. All day long, everywhere I looked, a bee was enjoying one of the bright pink flowers. There was a constant buzzing when I was working in the garden and I just haven’t seen the pollinators enjoy any other flower this much! I loved that I was helping the bees and really enjoyed how lively the vegetable garden was with so much insect life in it.
- It kept the weeds at bay. Very few weeds were able to get through the thick growth and those that squeezed through didn’t grow well because the crimson clover blocked most of the light from reaching them.
- The crimson clover enriched the soil. Even though I can’t see it, leaving the roots of legumes (clover is considered a legume!) fixes nitrogen and adds organic matter to the soil. My plants were exceptionally healthy this year and I attribute this largely to the crimson clover.
- The crimson clover was easy to remove when the time came. To clear it out, I simply cut the plant at the soil level, leaving the roots, and composted the plant. The roots did not cause any issues with the plants that I grew in that space next and only a few clover plants grew back from the roots, which was easily manageable.
As a cover crop or simply a beautiful edible flower, I wholeheartedly recommend crimson clover. I will be growing it throughout the garden next year for the flowers. I will not, however, be growing it as a live mulch again.
What Went Poorly
As a live mulch, I would say I went about this experiment wrong. Live mulch, ideally, needs to be a plant that doesn’t get very tall. If you do grow a tall plant as a live mulch, you must remove it early or keep it trimmed back. A part of why I grew crimson clover was the flowers and I didn’t realize how tall the plant would get before they bloomed. As a result, I let the crimson clover grow to maturity and it ended up taking over the garden a bit. The tall clover blocked light from some of my veggies and they were behind in their harvests because of this.
Additionally, the crimson clover died and left huge gaps in the garden. Sometime in July, the plants started to turn brown because I couldn’t keep up with deadheading and it was quite an eyesore. I slowly removed them and once all of the crimson clover was cleared out, the garden was rather sparse. In the interest of letting the crimson clover grow, I spaced out my other plants more than needed. Once the crimson clover between them was missing, the garden was oddly laid out, excessively spaced and there was just a lot of wasted surface area.
I could have had a more successful vegetable yield if I hadn’t let the crimson clover take up too much space and light. This was a fun experiment overall and I do not regret doing it. However, I wouldn’t do it again nor would I recommend others use the same methods I did.
My Recommendations
I think crimson clover would make a great cover crop (that is terminated before summer crops are grown) or as an addition to your garden for the edible flowers! If you get nothing else out of this post, consider it a plug for crimson clover in the garden. It is truly one of my favorite plants to grow now!
If you want to grow crimson clover as a live mulch, you need to keep it trimmed low enough to the ground that your other plants get adequate sunlight. It is hardy and won’t die as long as you leave some foliage to photosynthesize.
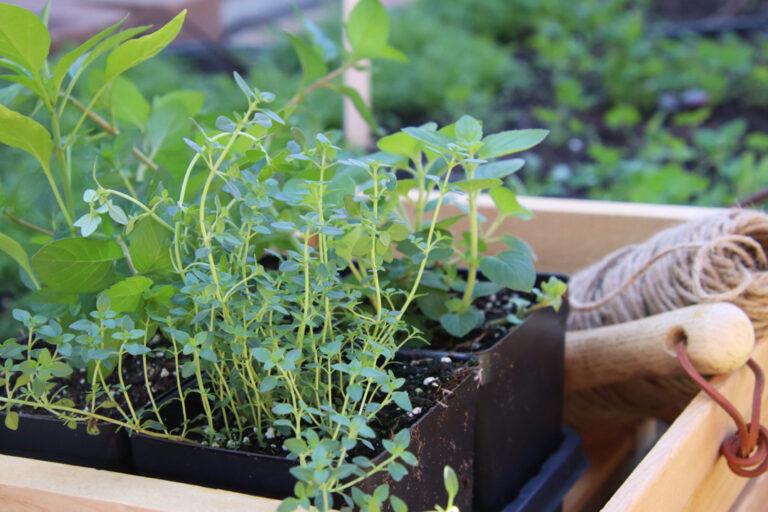
Live mulch is still an appealing method for mulching a vegetable garden, but I do not yet know what plant would be low enough to the ground and not too invasive for this purpose! Some options I may consider are creeping thyme, culinary thyme or sweet alyssum. Next year I may try again with a different crop in a small part of the garden so it isn’t too overwhelming to manage. For now, I’ll be working on growing my cover crops.
If you try out live mulch in an annual vegetable garden, please let me know how it went! I would love to hear your experience. Happy gardening!


One Comment
Comments are closed.